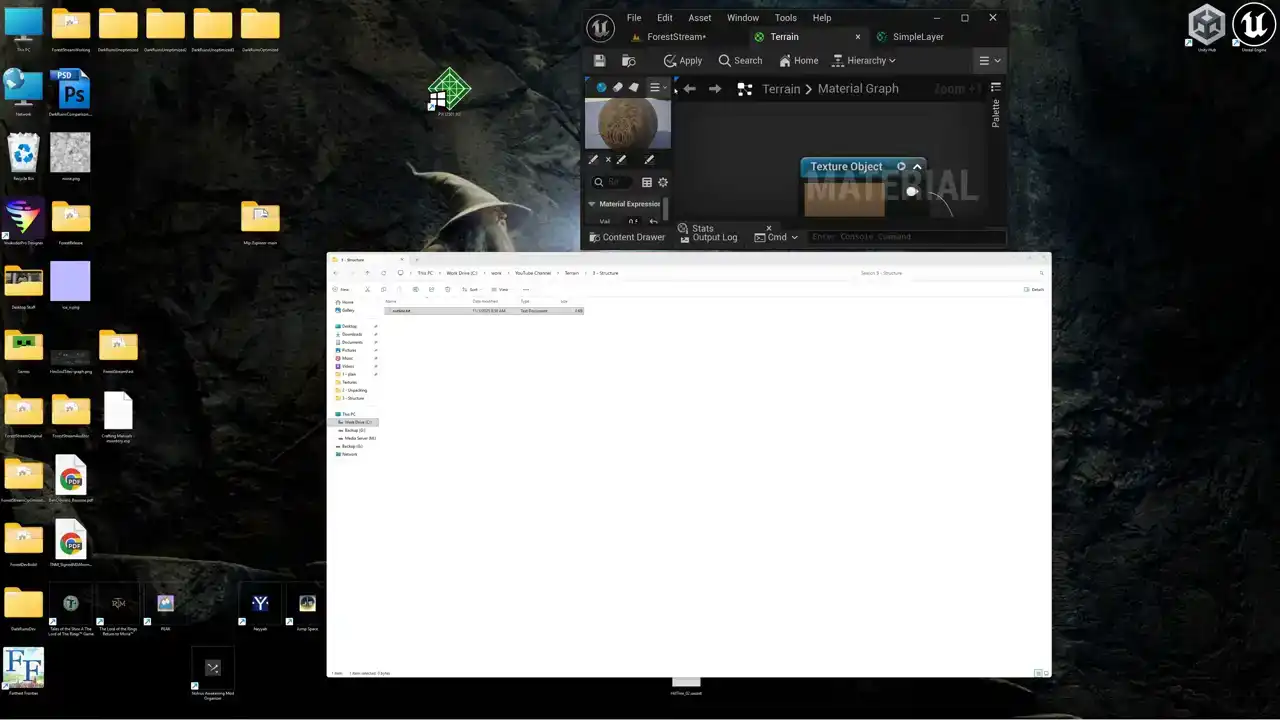
Terrain-Shader-Structure---Terrain-Shade
https://m.youtube.com/watch?v=0L5Azq6ugyo
Today, we're going to go over the structure of a terrain shader, including layers and blending in Unreal and Unity. Let's go. Alright, so we're in the middle of a series of videos on creating terrain shaders. So far, we've talked about packing textures and creating a simple layer shader. We're going to pick up today where we left off last time, so if you haven't seen the previous videos in the series, I'll link the playlist down below so that you can catch up. So today, I'm going to show you the structure of a terrain shader. We'll start out in Unreal, and then we'll switch over to Unity in just a minute. But before we go over the shader structure, I want to show you one thing that I forgot to talk about in the in our video last time and that's specular if we take a look at the simple
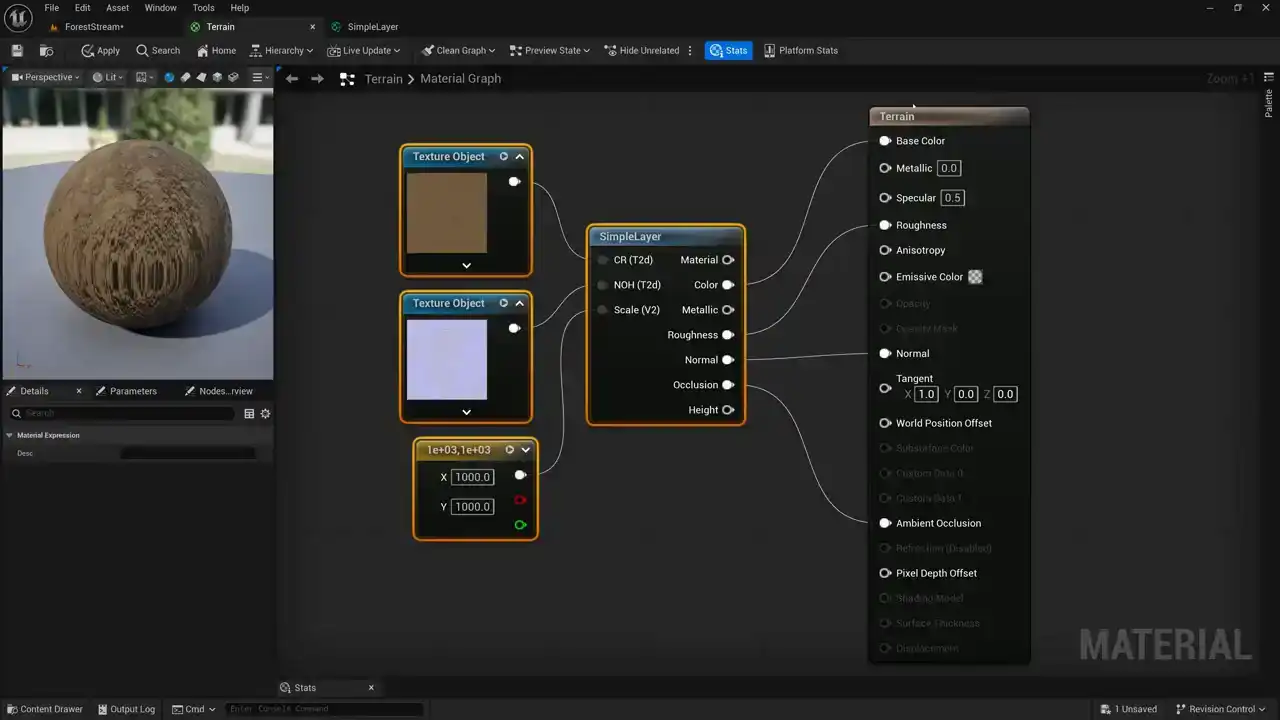
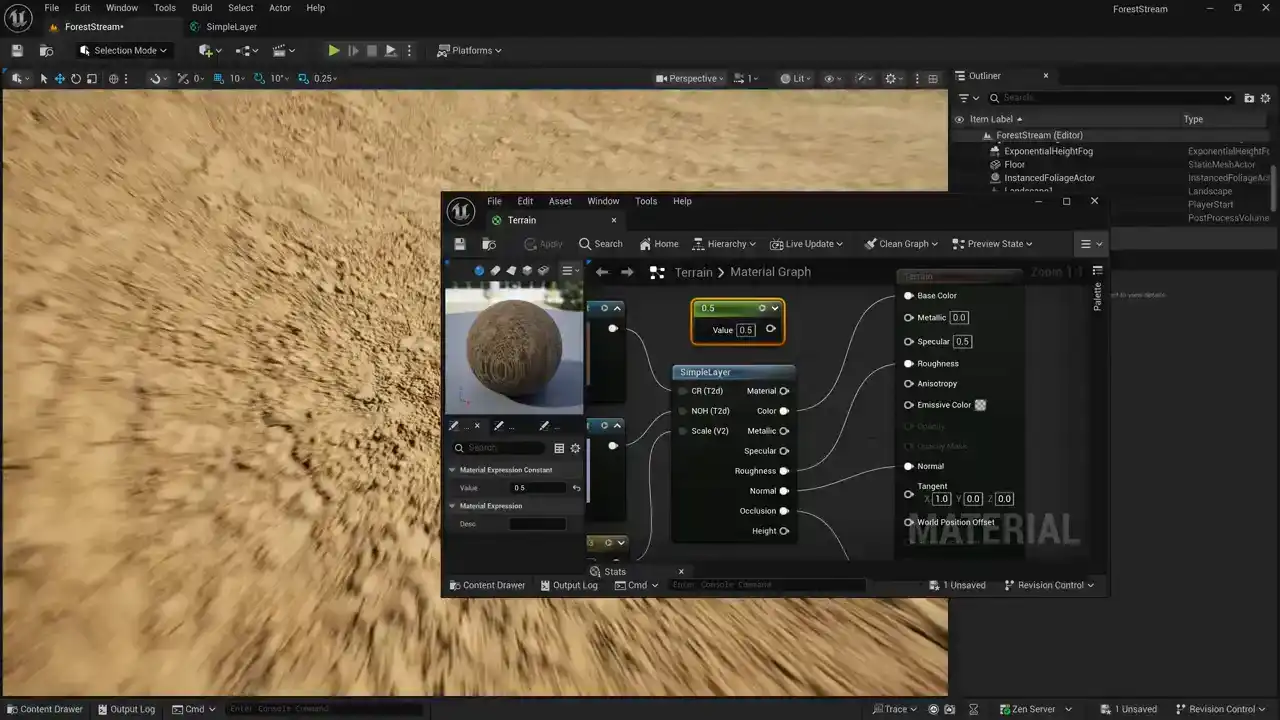
terrain shader that we created last time you can see that on our main node here we have this input called specular and it's defaulting to 0.5 and what this is controlling is the brightness or the intensity of the reflections of the surface of this material. And our value of 0.5 represents reflections of about 4%. And what I mean by that is that when light comes in and hits the surface, about 4% of that light is reflected. And for about 90% of materials, that's about how much light they reflect. And I'm talking about non-metallic materials here, by the way. Metallic materials are much more reflective, but for non-metallic materials, this value of 0.5 means they're reflecting about 4% of the light. So if I put down a hard-coded value of 0 and we pass that into our specular, did you notice over here in our preview how the object just got darker? that's because we just killed all of the reflections and we're only reflecting diffuse light now and not any uh like reflected light or specular light because we've set our specular value to zero so the default is 0.5 and now you can see there's a little bit of blue here coming from the sky our material is is reflecting the sky here but if i set this to zero you can see it's gone to black now so it's kind of like kind of like ambient occlusion but instead of occluding the diffuse light it's occluding the specular light or the reflected light so by default this is set to 0.5 if i set this to one we're now getting uh reflectance of eight percent of the the light which is very high there are very few objects that are actually this reflective and most objects are right around 0.5 so what can we do with this specular value if we leave this disconnected and just leave it at 0.5 that's fine our material work will work great and it'll actually be a little bit cheaper because our specular value is just a hard-coded value of 0.5. But if we want to get a little bit fancier in Unreal, we can go ahead and use this specular value for specular occlusion. And we can use a cavity map. So a couple of weeks ago, we used Substance Designer to pack all of our
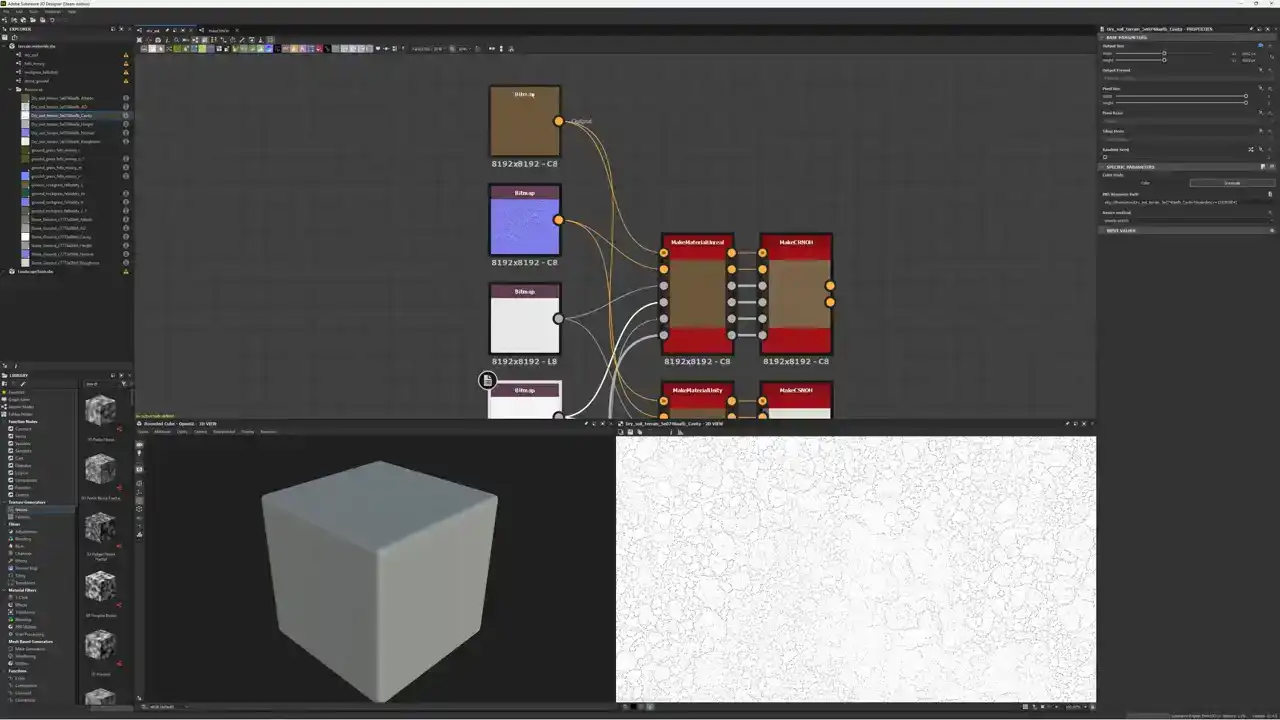
textures from our material into just two. So here you can see we've got our color and our normal map and our roughness. And here we have a map that is called our cavity map. And it looks like this. If you look down here in the lower right, you can see what our cavity map looks like. Basically, in all of the cracks of the material, it's a darker value. It's kind of where the light doesn't get into the cracks because the object is occluding itself It similar to ambient occlusion but not quite Not quite the same because ambient occlusion is for the diffuse light whereas the cavity map is for the specular or reflected light. So I've passed both the cavity map here and the ambient occlusion map into our nodes here that are creating our two textures. And if we take a look at this Make CRNOH node here, we're using this one for Unreal. If we take a look at this node, you can see that our cavity map is coming in here from specular level. And our ambient occlusion map is coming in here. And our blend node here is just set to multiply.
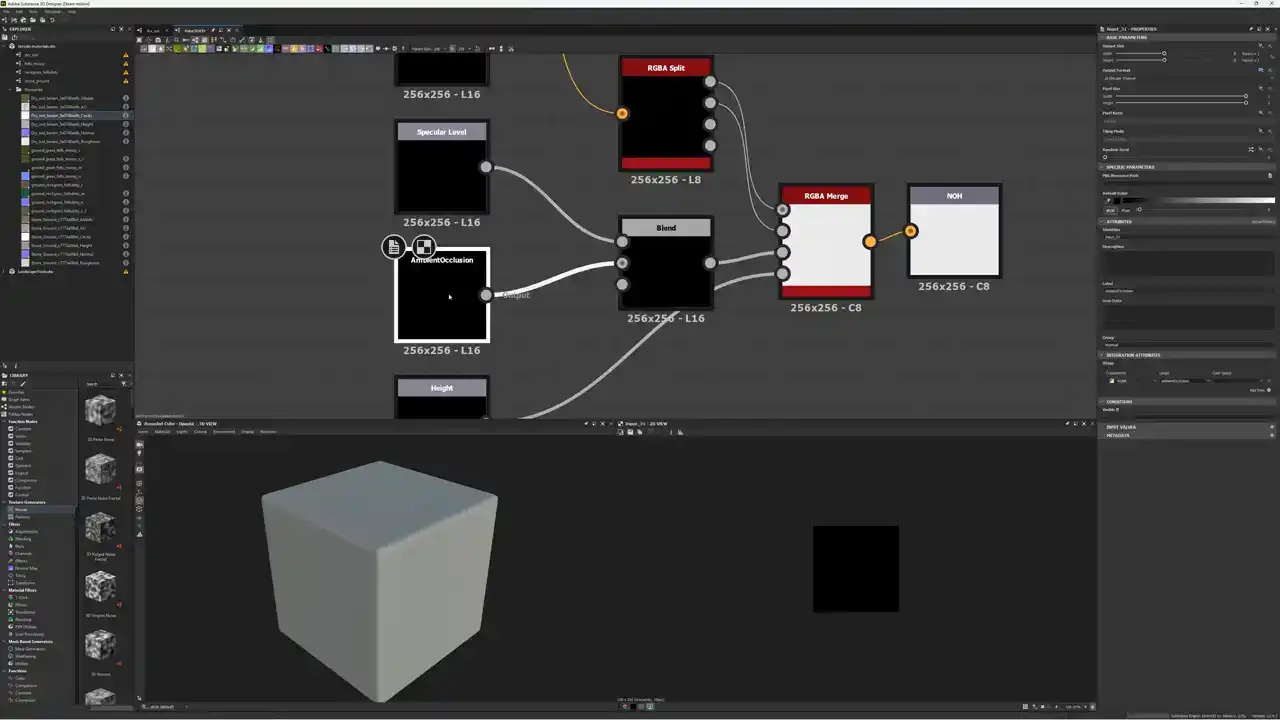
So we're just multiplying our cavity map and our specular level map together. And we're putting both of those into the blue channel of our NOH texture here. And so in our shader, all we need to do is separate them out again. And that's pretty easy to do.
Let's switch back to Unreal here.
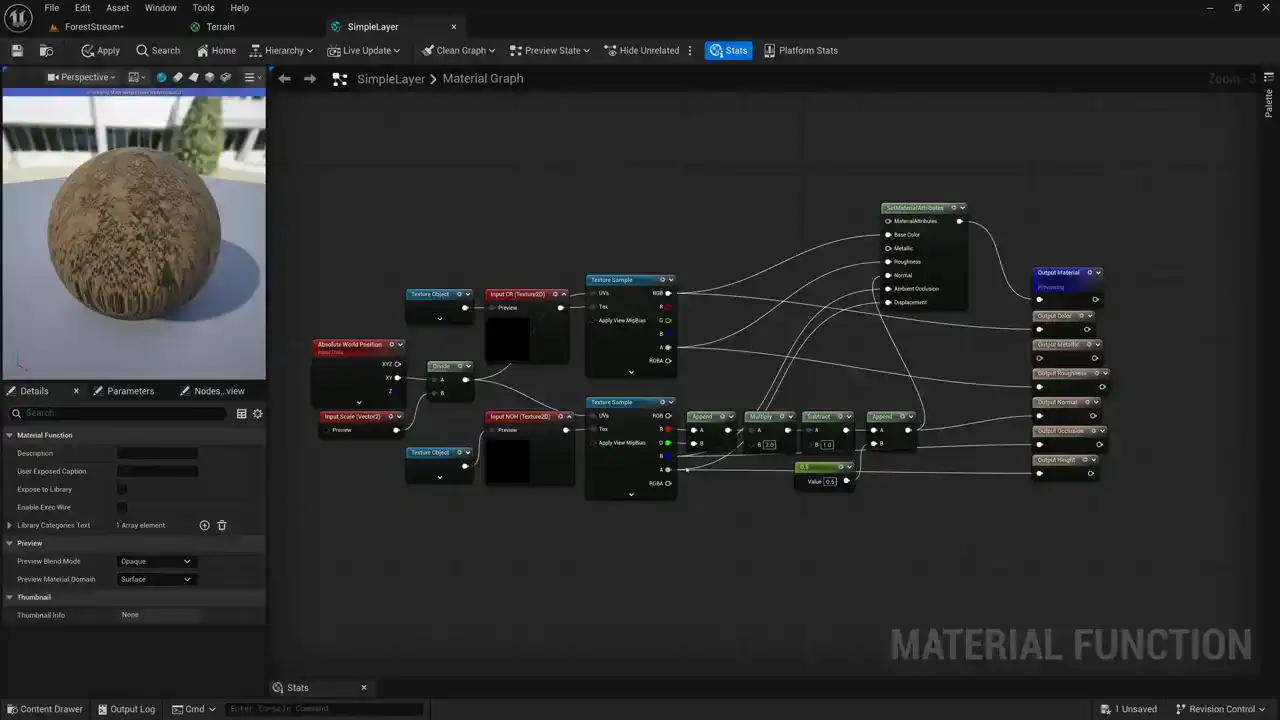
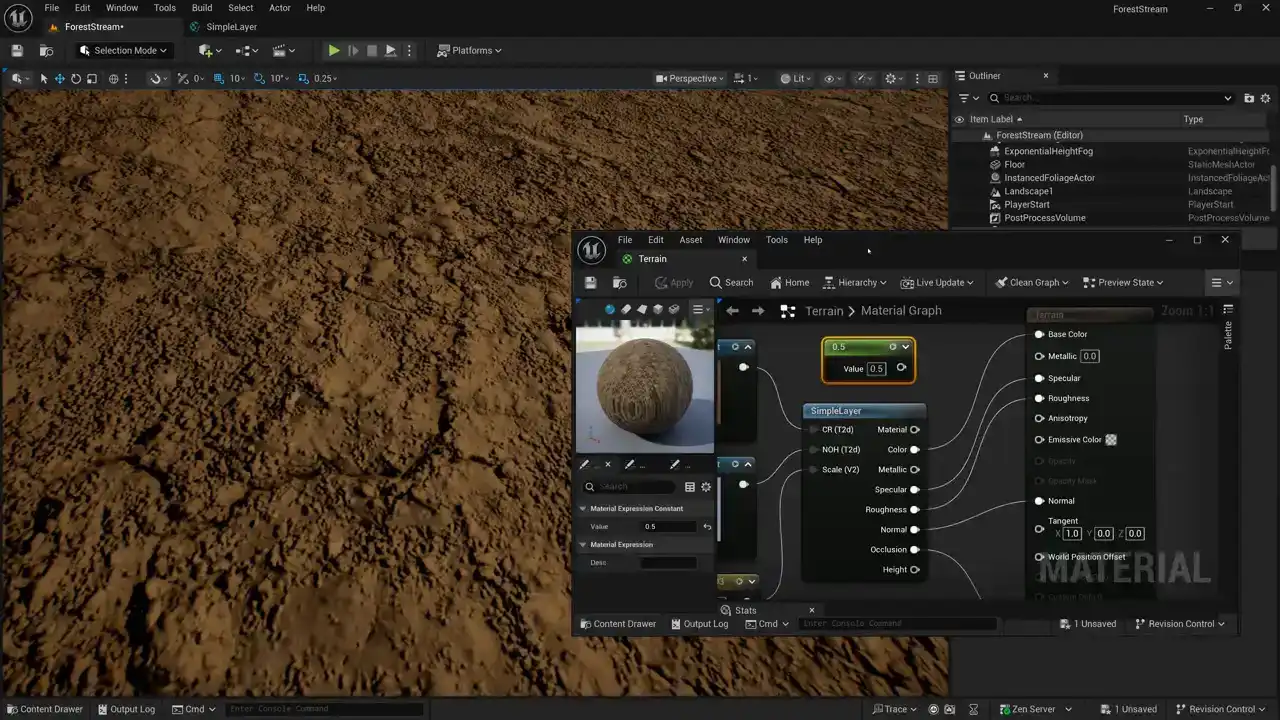
And we'll open up our Simple Layer shader. And here's our NOH texture that we're sampling. And so our blue channel has our ambient occlusion and cavity map multiplied together. And you can see we're passing that out to the ambient occlusion slot. But if we want a specular slot, we need to separate out that crevice map. And we can do that fairly easily. We can just come down here and add a cheap contrast node. And then we can set our contrast to a value of 2, then multiply our cheap contrast by a value of 0.5 now remember 0.5 was the default value that we used as the output for specular so here our specular is set to 0.5 by default so we multiply our crevice map by 0.5 so it doesn't get any brighter than that because we want we want to make sure that our reflections are not overly bright. So we take the ambient occlusion and crevice map multiplied together, set a cheap contrast to a value of 2, and then multiply by 0.5, and that's going to give us our specular level. And now we just need to create an output for it. And that's pretty easy. I'll just go ahead and do that off camera. Okay, now you can see for my set material attributes node here, I've added a specular input and I've passed my specular into that. And I've also created a new output here called output specular and passed my value into that. Now I do need to make sure these are happening in the right order. So I'm going to set this to zero, one, two. I'm going set this one to three, four, five, six, and my height is going to be seven. And now I can save my simple layer. And when I come back to my shader, now you can see I've got this specular output that I can connect up to my specular input. Now the result is pretty subtle. I don't know if you're
going to be able to see it at all but we'll switch back here to our scene and
come over here and take a look and what I'm gonna do is just disconnect my or just rip my shader tab off there so that we can toggle back and forth between specular and no specular so take a look right here on my terrain I'll disconnect
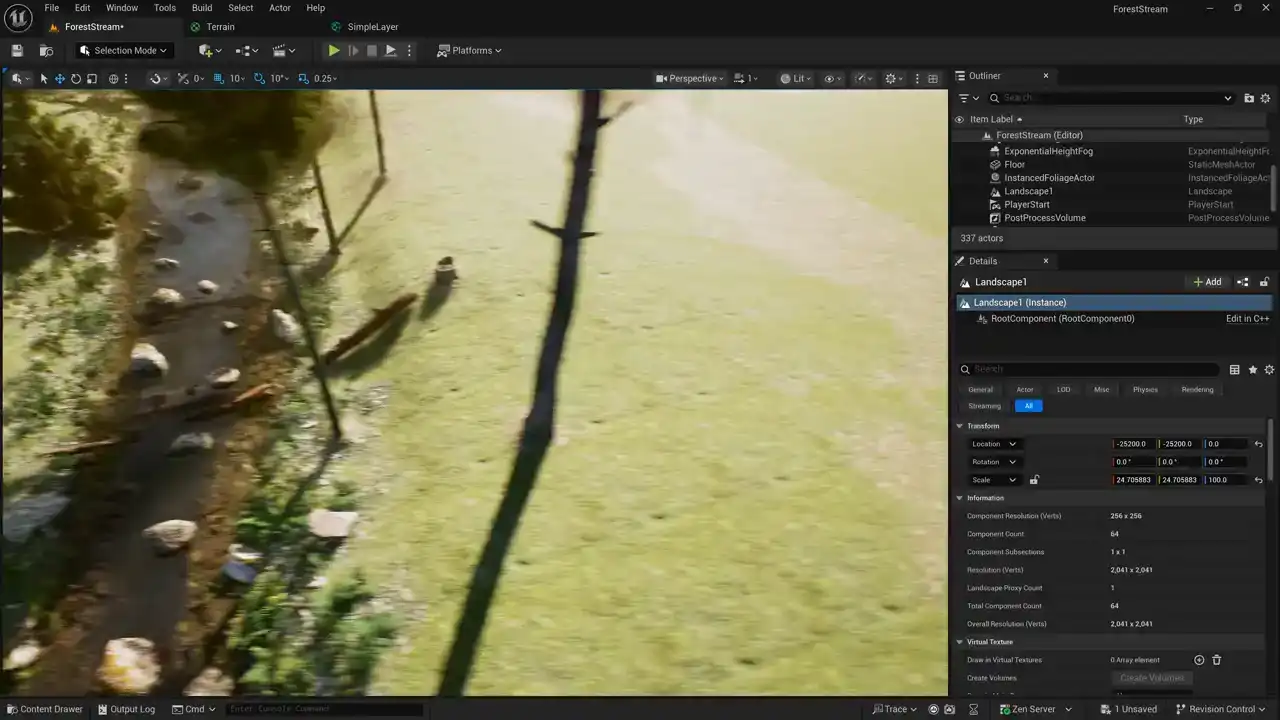
the specular and save it. And honestly, I saw very little difference. But if we come up here and reconnect our specular again, yeah, it's going to make it so that we don't get reflections down in our little cracks and crevices on our material And like I said if you want to leave that out if you want to make your shader a little bit cheaper you can get away without doing that but yeah it going to add just a little bit more realism to to the specular and if we really want to see what's going on here we can come up here under our lit menu and come back down here to buffer visualization

Pick specular and that'll show us just that specular channel that we just created And you can see here that we've got a value of 0.5 everywhere except for the cracks Where we've got our masks set to be darker, so we're not getting reflections down in those little cracks and crevices Where the object would be self-occluding? Okay, let's go ahead and talk about
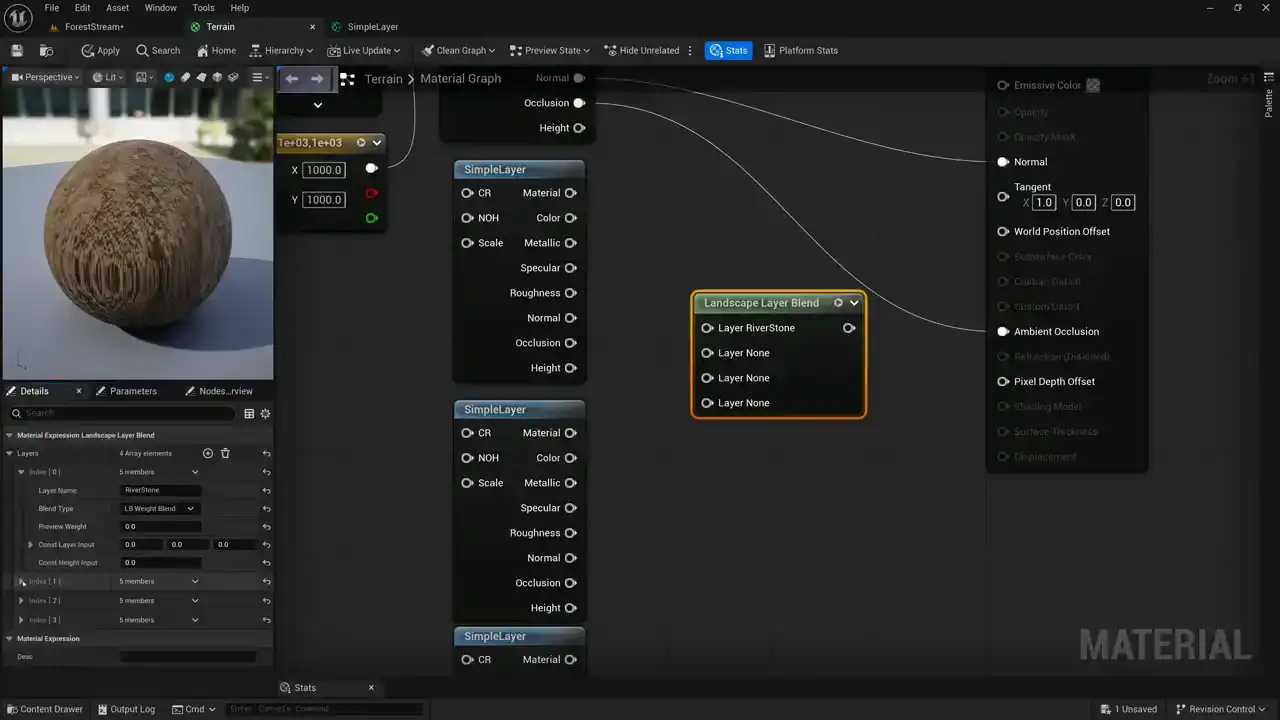
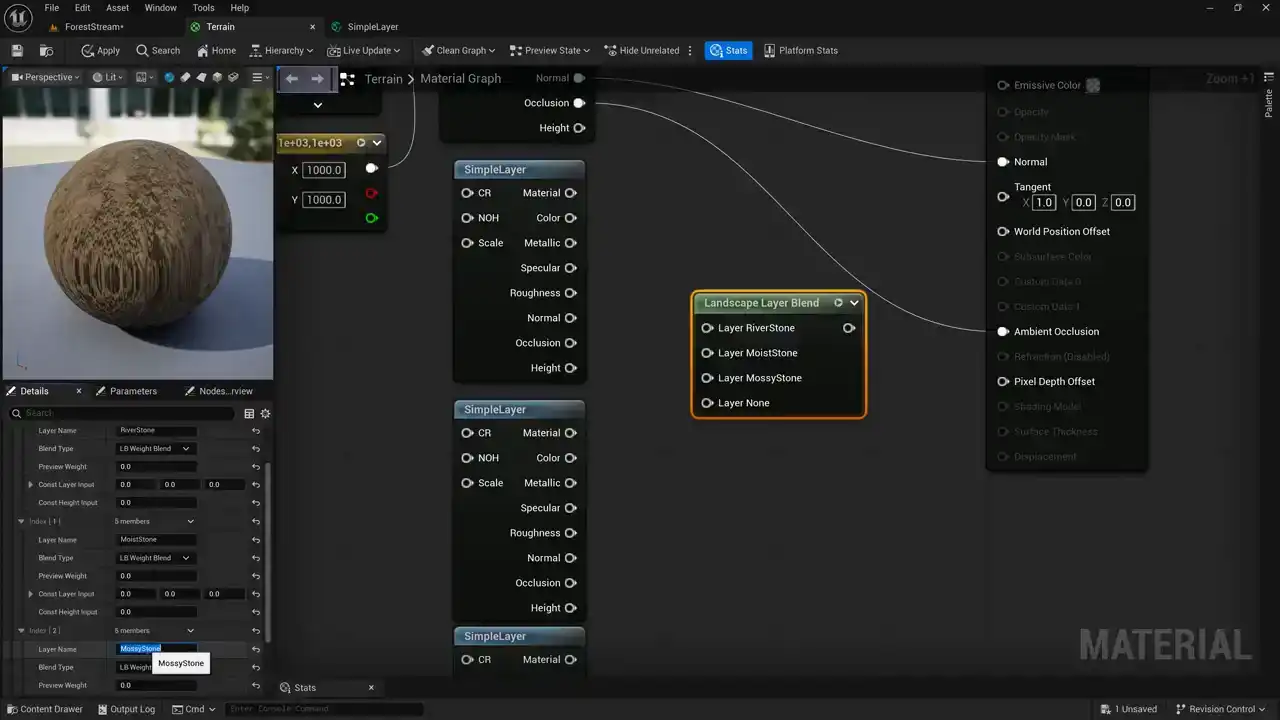
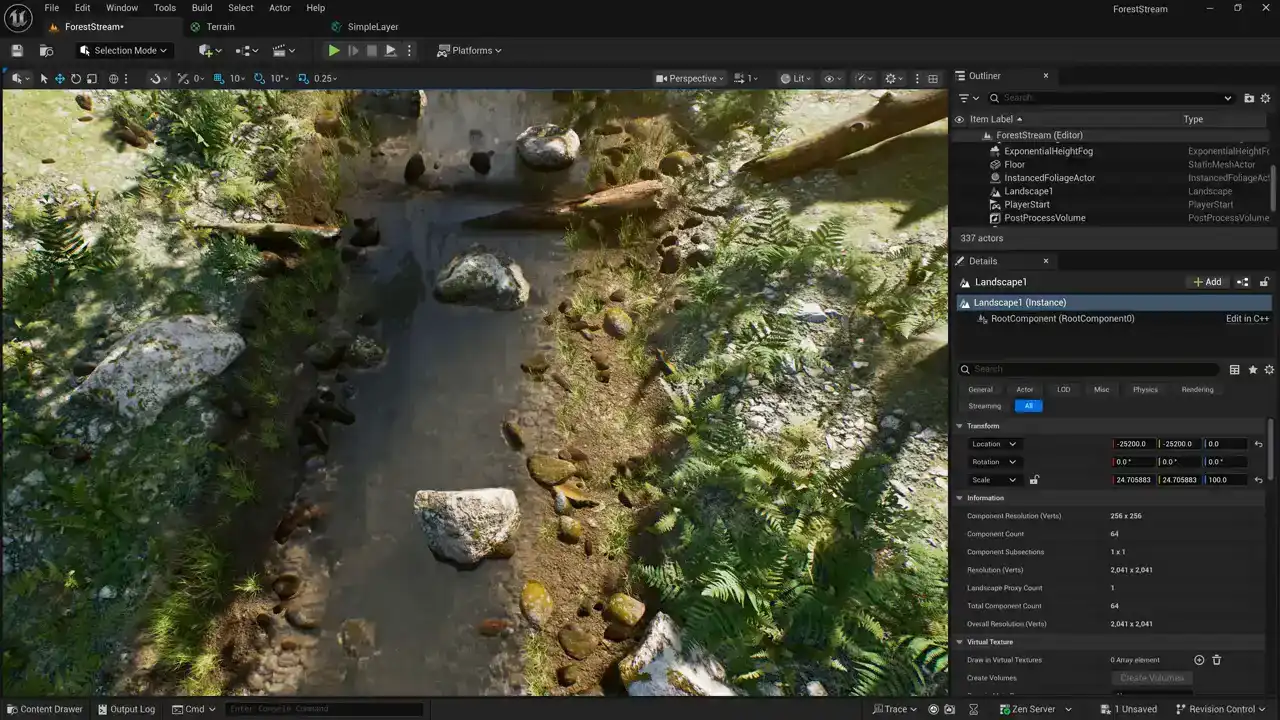
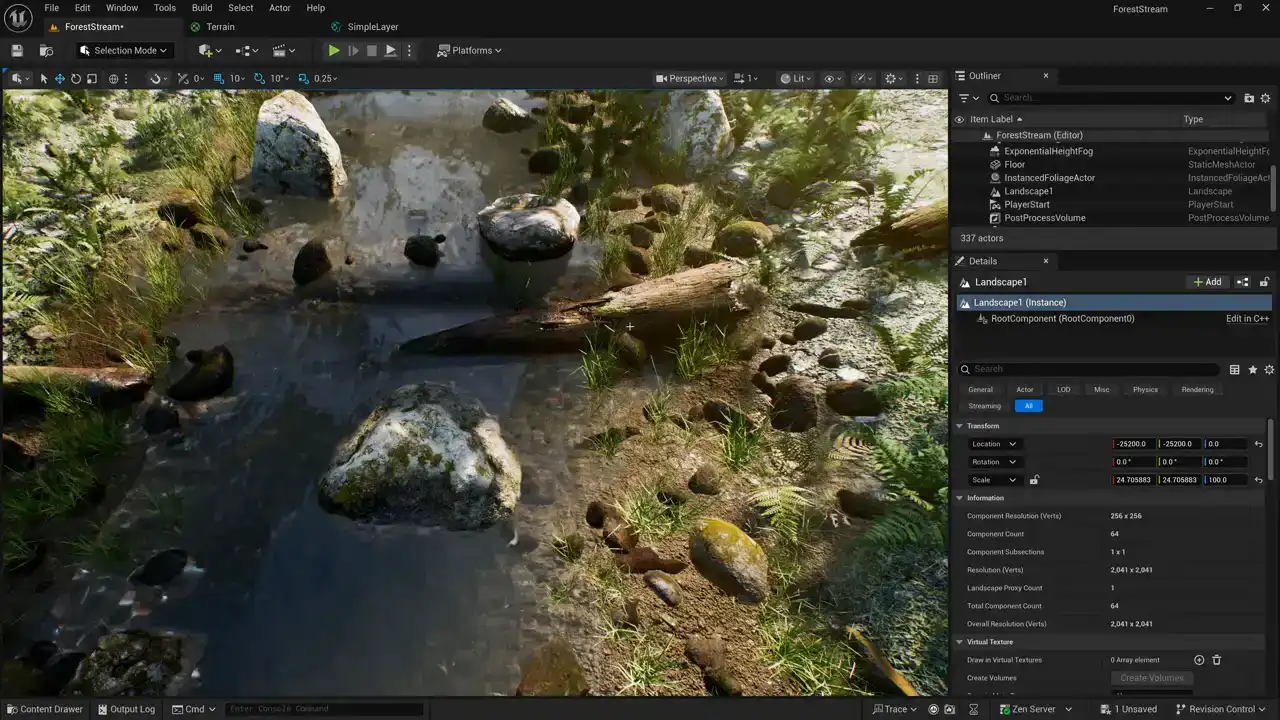
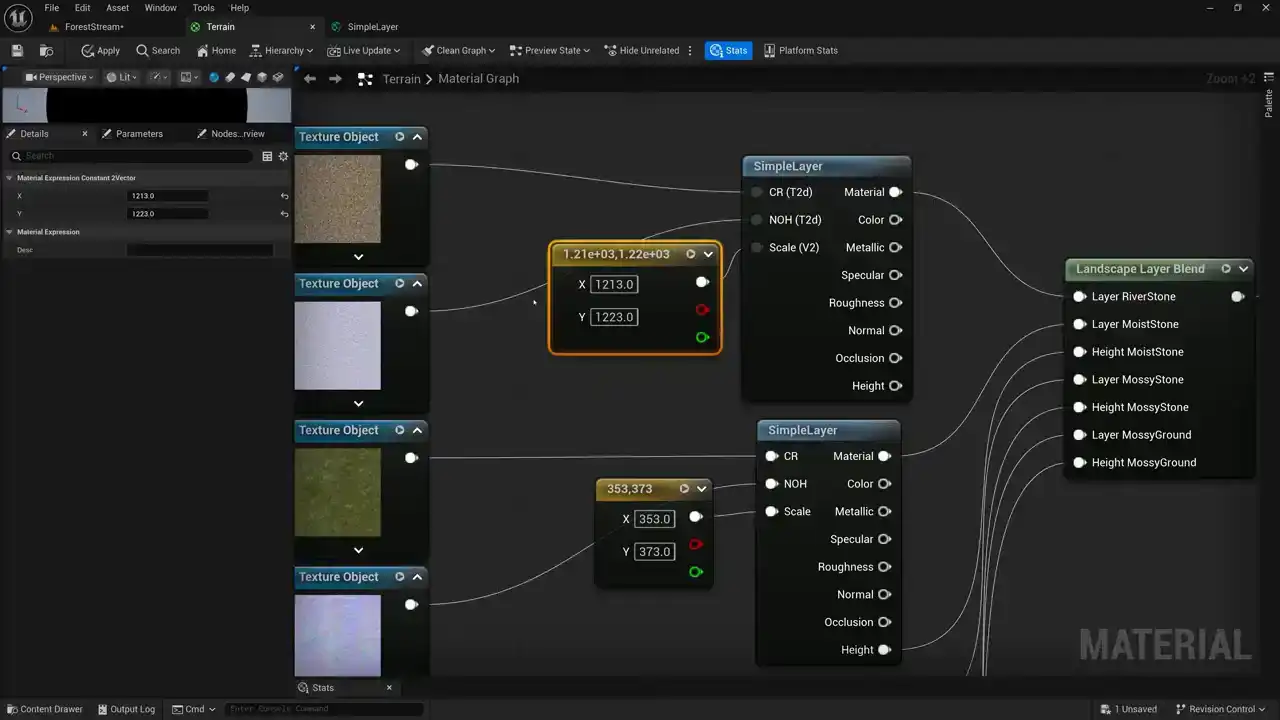
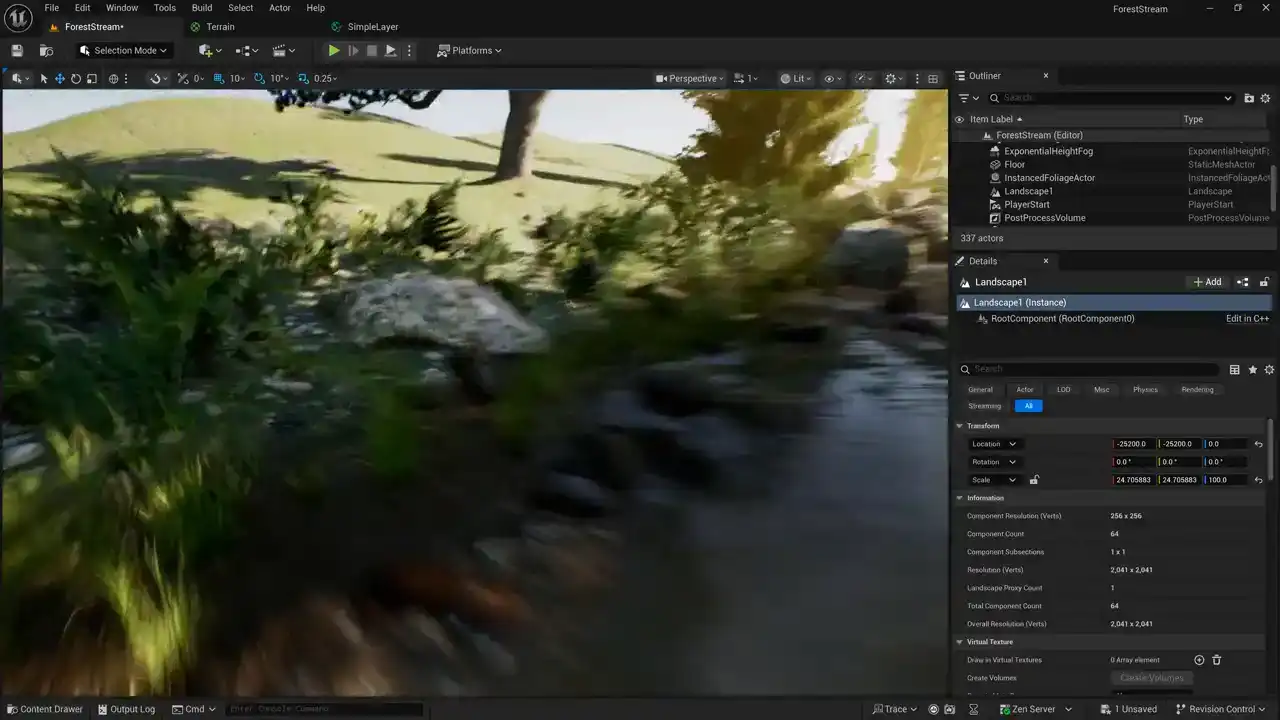
the structure of of a terrain shader so right here we've got uh the most simple terrain shader and what we're going to do right now we just have one layer we have our simple layer here and what we're going to do is duplicate our simple layer and we're going to make four layers so i'm just going to make four copies of this simple layer node And we need to bring in our texture objects here for each of our different layers. And then we need to blend our layers together. When we made our simple layer material function, we passed all of our material parameters into this material input. And then we also passed them out separately here. Let's take a look at that really quick. So we use this set material attributes node to combine all of our inputs into one single wire. And that's coming out of this output material. And so whenever we want to pass our material parameters around, we just do that with this one output here. And so what I'm going to do is we're going to type landscape. By the way, in Unreal, we use the word landscape. And I often use landscape and terrain interchangeably. Unreal favors the word landscape and Unity favors the word terrain. And they both mean the same thing. But the nodes in Unreal for dealing with terrain are just called landscape. So I'm going to create this node called landscape layer blend. and this is the node that I can use to blend all my layers together. So the first thing that I need to do is define how many layers and what type they are. So over here I have an array that represents layers and right now my array is empty. So with my landscape layer blend node selected, I can add layers. So there's one layer, two layer, three, four. Now I've got four layers and I need to make sure that I give my layer my layers names and the names have to match what my terrain already has so right here I give my layer a name and this text string has to match what my
terrain has so let's switch over to my terrain and this is just the terrain that I've been using for a long time. And so it has some names, but they're left over from previous tutorials that I was creating. Let's just go ahead and take a look at the names that this terrain has.

So instead of selection mode, I'm going to drop this down and switch to landscape mode instead. And that's going to open this nice panel over here on the left. Now notice that I have the tab set to paint uh if i have it set to sculpt or manage it's not going to work so i'm going to take a look at paint and if we come down here you can see that i already have uh i already have like six layers set up here already um and if i drop this down you can see that i got the names of these layers set up So I got Forest Roots Forest Ground Moist Stone River Stone Mossy Stone and Mossy Ground I have these layers created already. So I need to take these exact names that I have on my terrain and plug them into that Landscape Layer Blend node. So let's just go ahead and use, let's just go ahead and use forest ground.
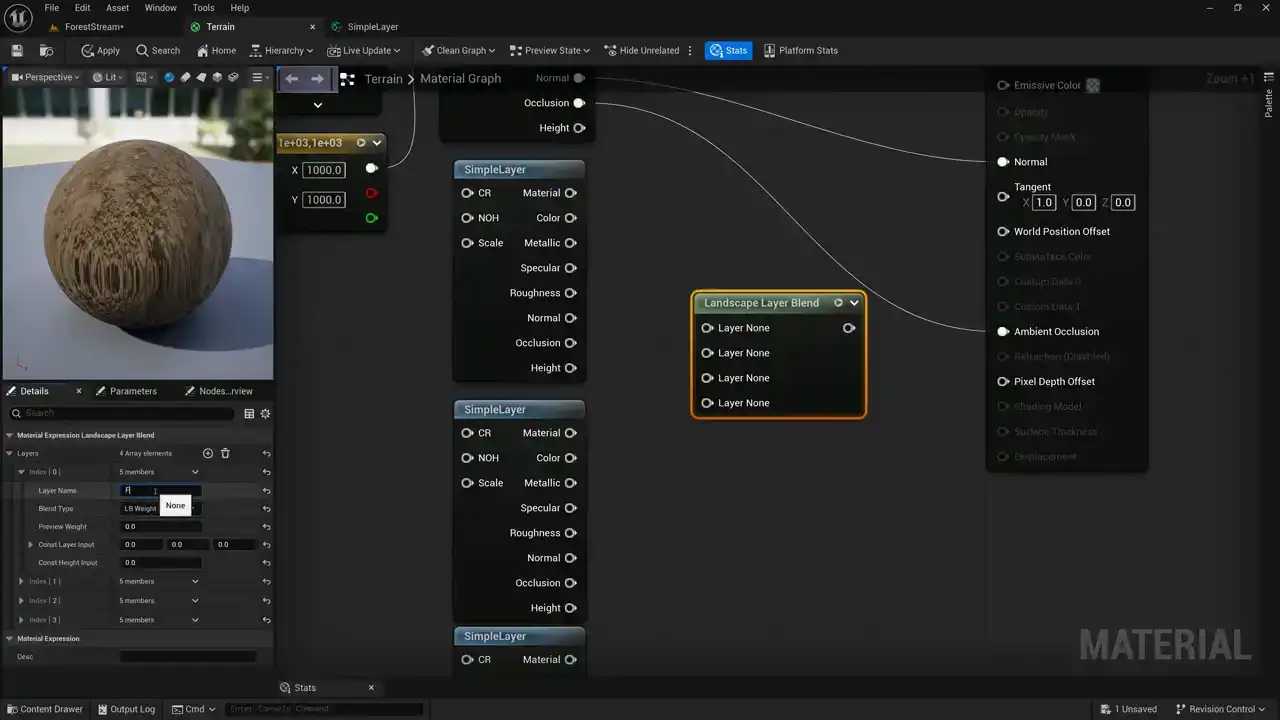
So I'm going to come over here and for the layer name, I'm going to type forest ground. And then the order that we put these layers in is important. We want to kind of layer them up from the lowest layer to the highest one. And in my case, I think that my stream bed here is going to
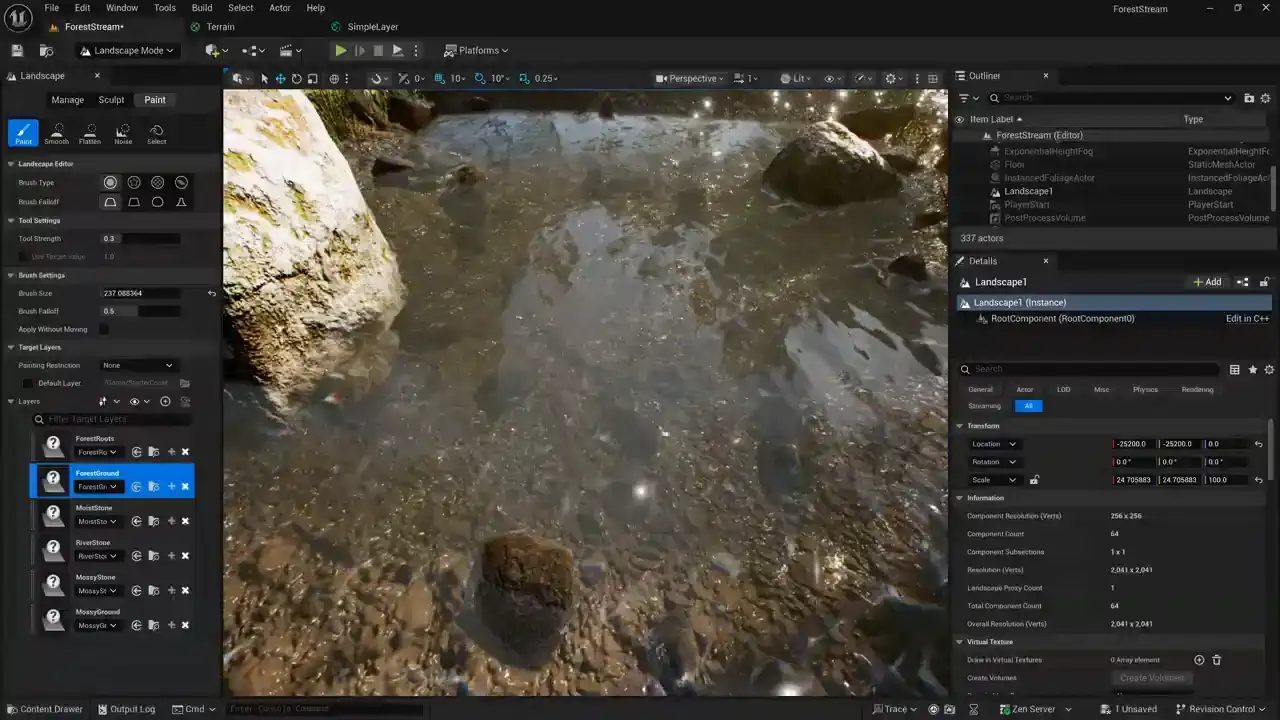
be my lowest layer. So whatever the name of, that's going to be called Riverstone. So I think
I'll make that one my first one. And then for my next one, I'm going to use Moiststone.

and let's see what else we have here so we've got forest ground or sorry we've got river stone we've got moist stone then we have mossy stone so that'll be my next one
and i want to make sure that i have these names matching exactly and then for my final one
i think i'll just use mossy ground
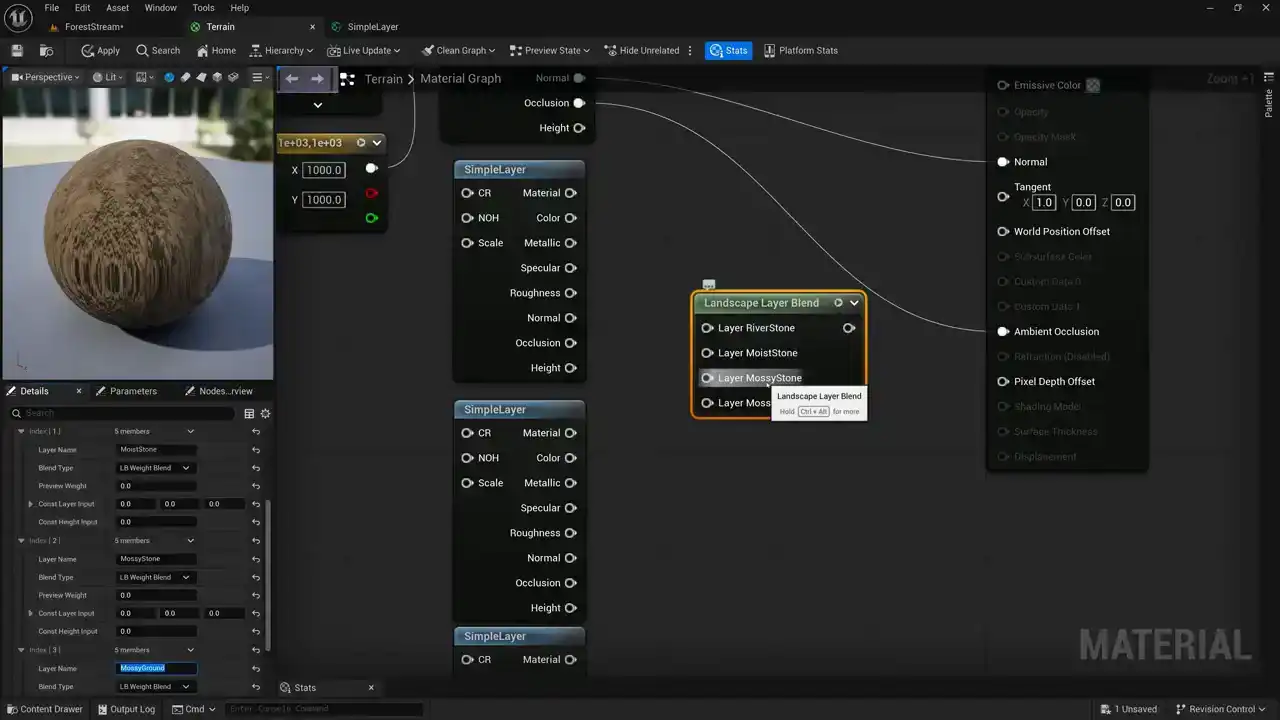
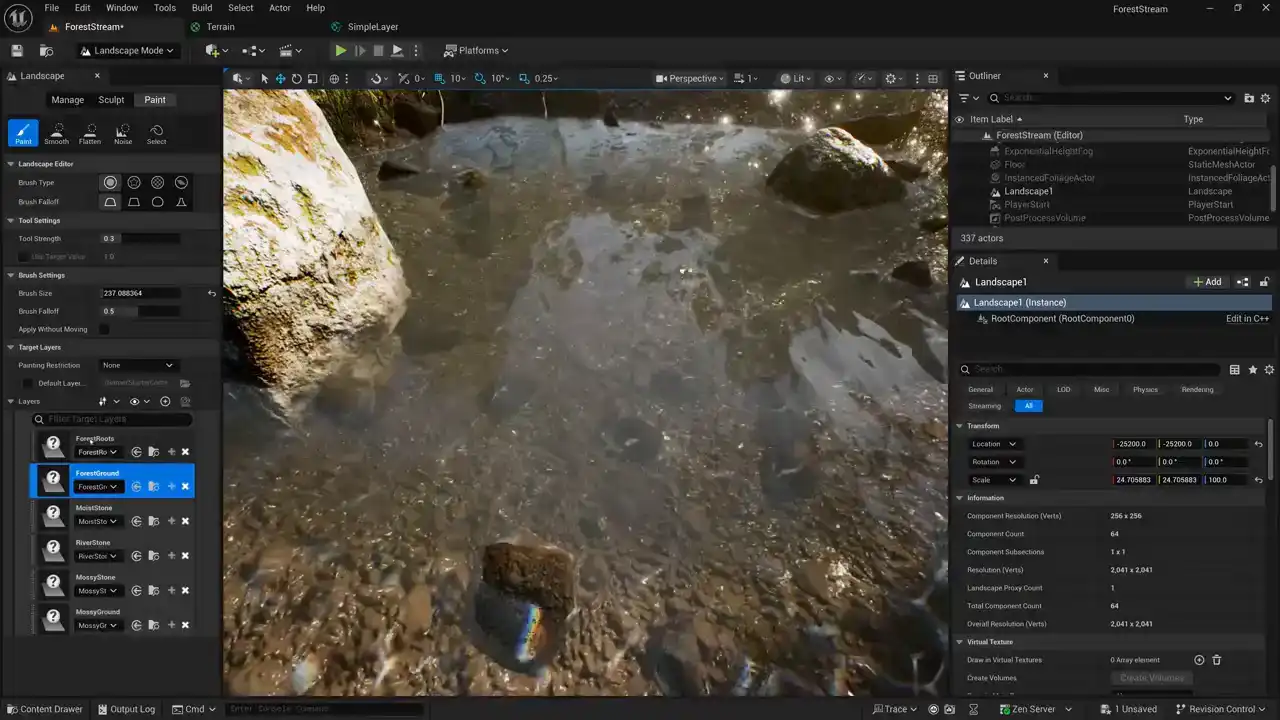
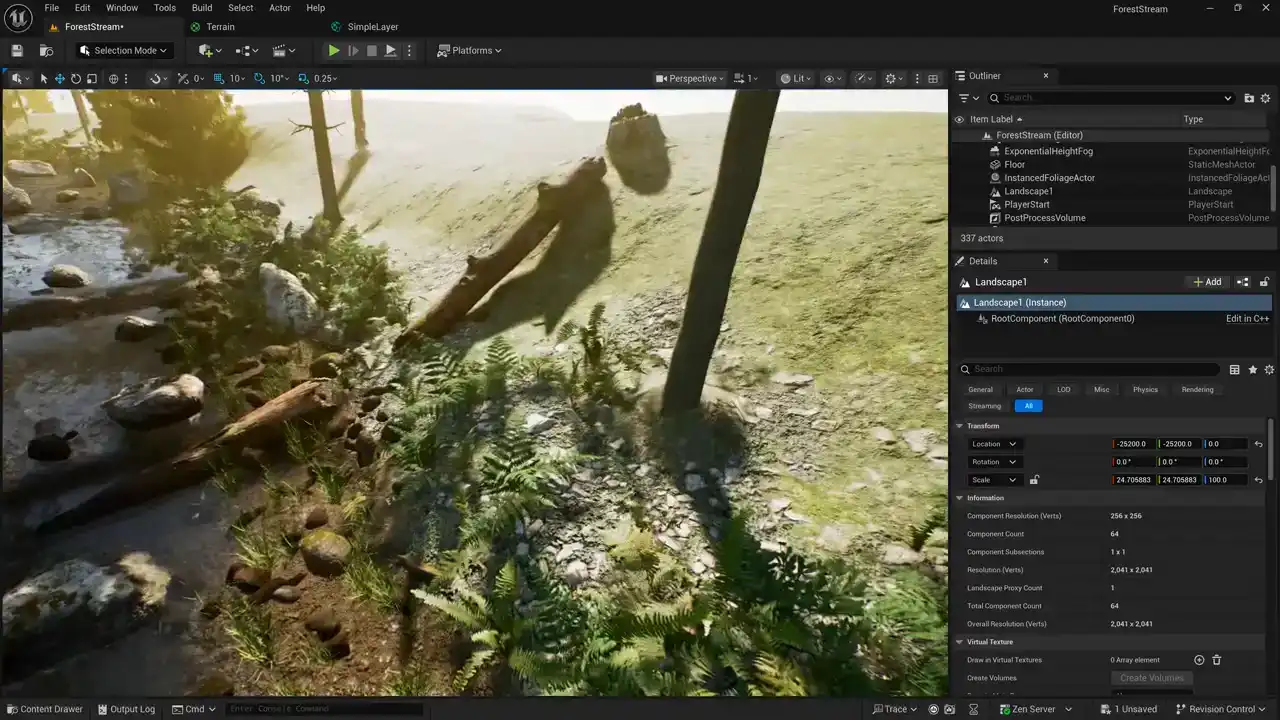
okay so I've got river stone moist stone mossy stone and mossy ground now the next thing that I want to look at is the type of blending that we're using so for this first one it's our base layer and so we can just use it we can just leave it set to LB alpha blend but the others we want to use height blending and so I'm going to set LB height blend for these and notice when I do that that it exposes this height input so that we can pass that layer's height into our layer blend node. And I'm just going to go ahead and set all of our other layers to be LB height blend. Okay, so now that we have our layer blend node set up here, we can go ahead and pass in the the materials for our layers. So I'm going to pass in this layers material. I'm going to pass in the next layers material, the third layers material, and the fourth layers material. And now we need to pass in the heights. So I can pass in the height for my second layer, the height for my third layer and the height for my fourth layer so this is showing you how this structure works when you are creating a landscape a shader so you have your layers set up they pass into the layer blend node and then they come back out and when they come back out it's just a material output here and so we actually need to create a node that will split out our material into its individual material parameters so that we can connect it to our output here so in order to do that i'm going to use a node called get material attributes and then i need to tell it which attributes i want so i'm going to hit this plus sign next to my array and we'll just expand this and i want a base color and i want a metallic and i want a specular and i want a roughness i don't need an anisotropy we're gonna add a normal and an occlusion okay so there are my attributes and i can just connect up my color my specular my roughness, and my normal. And then this last one, I'll just set that to ambient occlusion and then we'll set that up. Okay, so you can see here I'm blending all my layers and then I'm unpacking my parameters and passing them out to my final layer. Okay, so that is the structure of our overall terrain material. And now the last thing that I need to do is go ahead and plug in my texture objects. so I'll go ahead and do that off-camera hey off-camera I went ahead and assigned all these texture objects here you can see my first texture object is my stone ground material so I have my stone ground CR and my stone ground NOH texture assigned then my next one is my fels mossy and I have the CR and the NOH texture. Then my third one is the dry soil and I have both the CR and NOH and then finally I have my rock grass CR and NOH. Now there is something really interesting that I've done here. In addition to passing the textures into each layer I've also passed a scale value in and you can see here that I've got these various different numbers assigned for scale and I want to talk about this I have kind of an interesting technique that I've developed for for scale of landscape textures let's take a look at our landscape over here and you
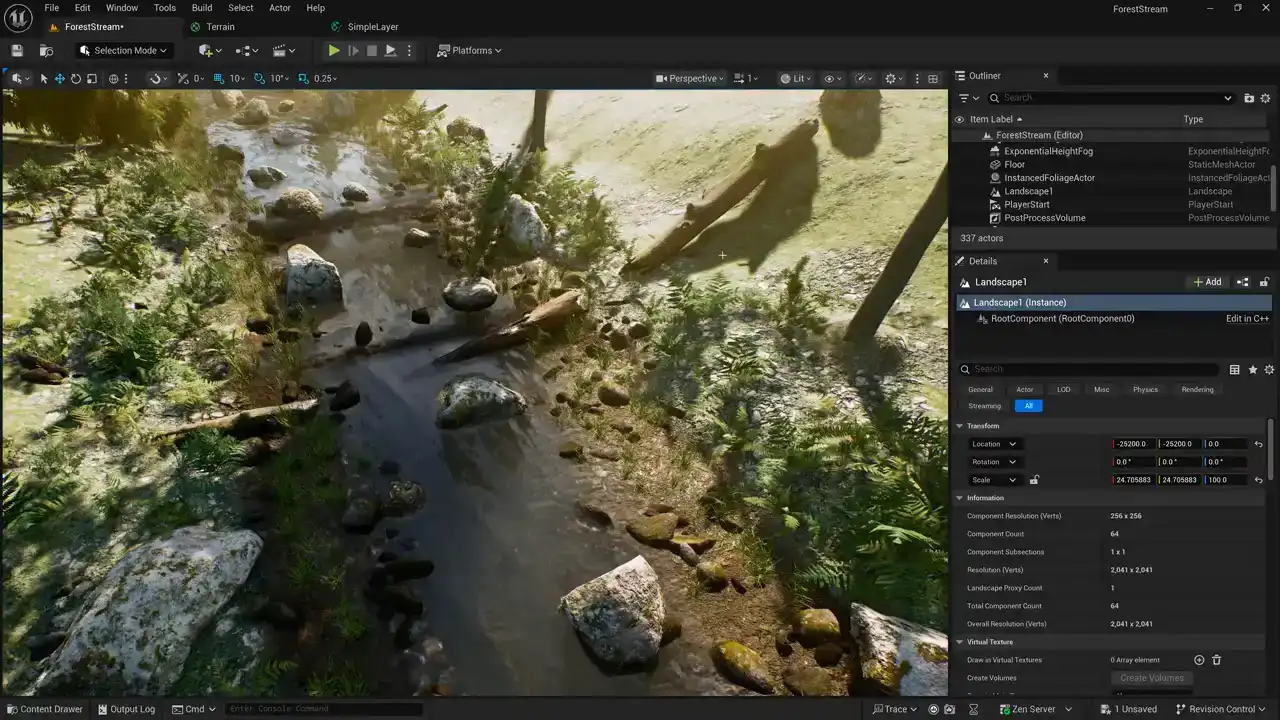
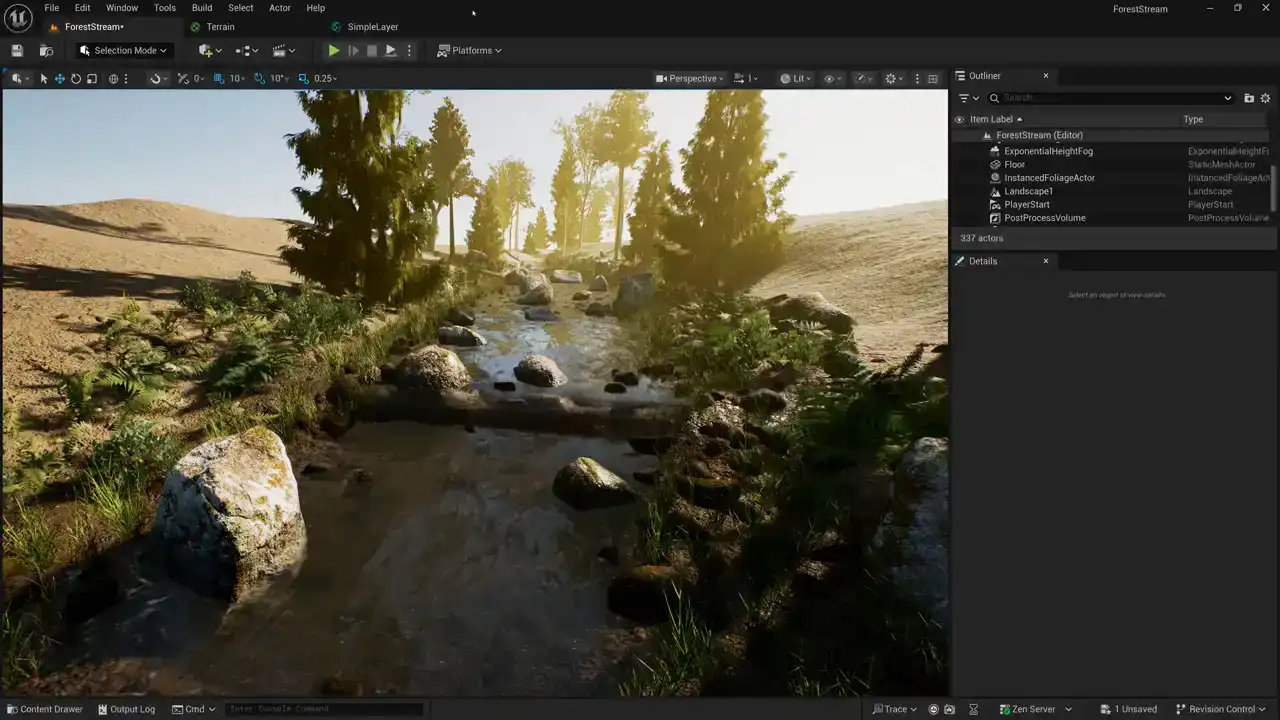
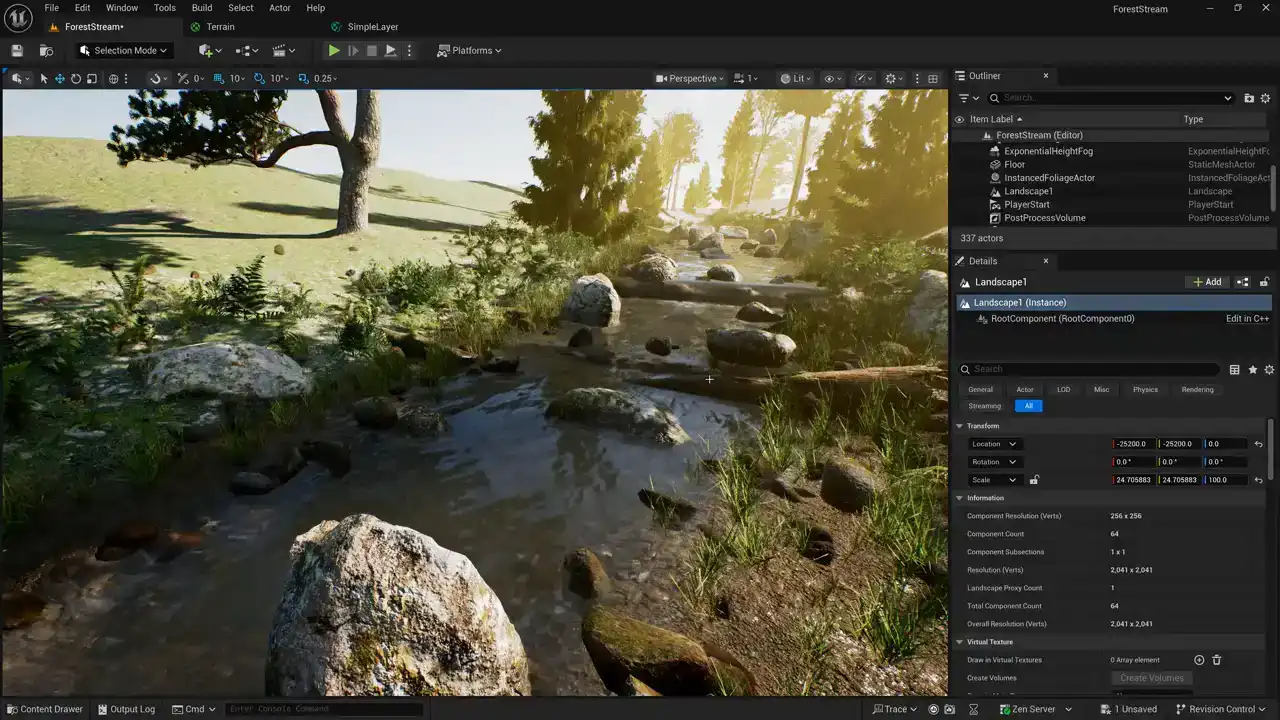
can see that I've already painted masks where these textures belong and we're not really going to get into that because this isn't a tutorial about creating environments necessarily it's mostly going to be focused strictly on creating the shader but you can see here that i've got these rocks under my um under my stream
and then here on the bank i've got kind of this mud going on and then um this kind of rocky
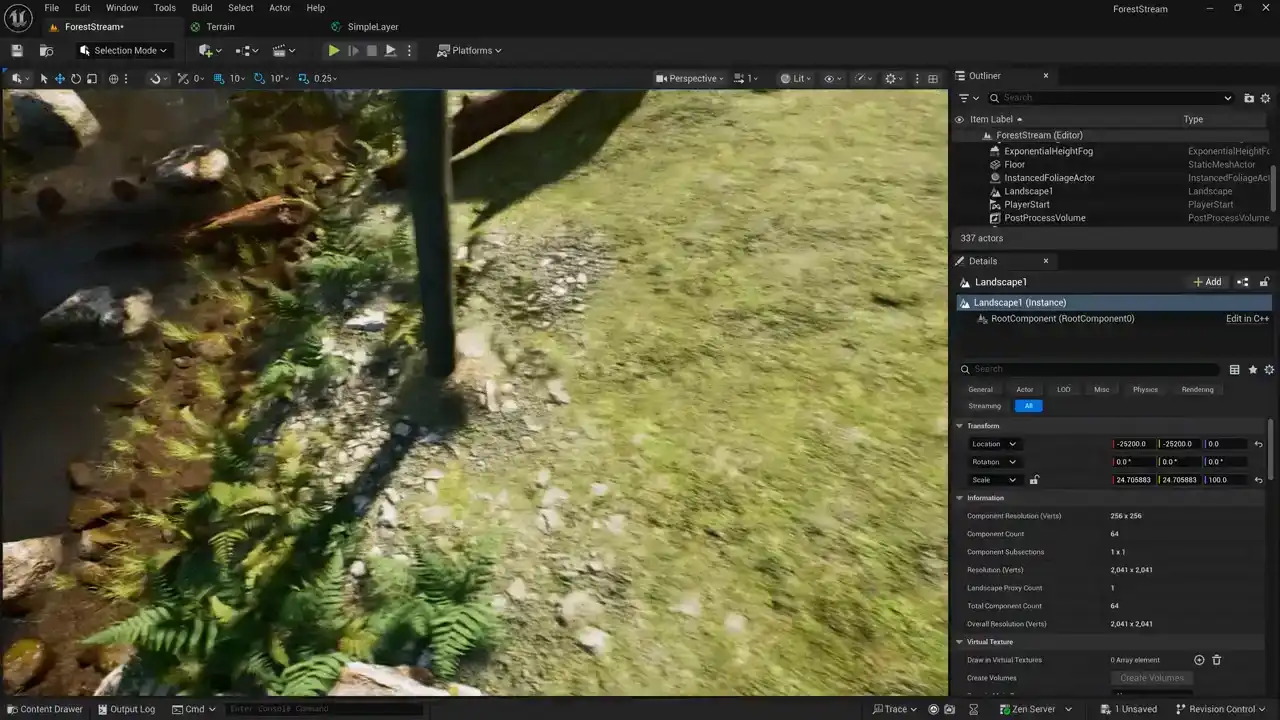
terrain and then this mossy so uh we're doing some nice blending here between
the rock that's in the stream bed and then mud on the edges and then kind of this mocky mossy rock
and then just the moss up here on the banks and i've i've worked i've done a little bit of work to
to size these to create some scale that i kind of like and the numbers that i've used
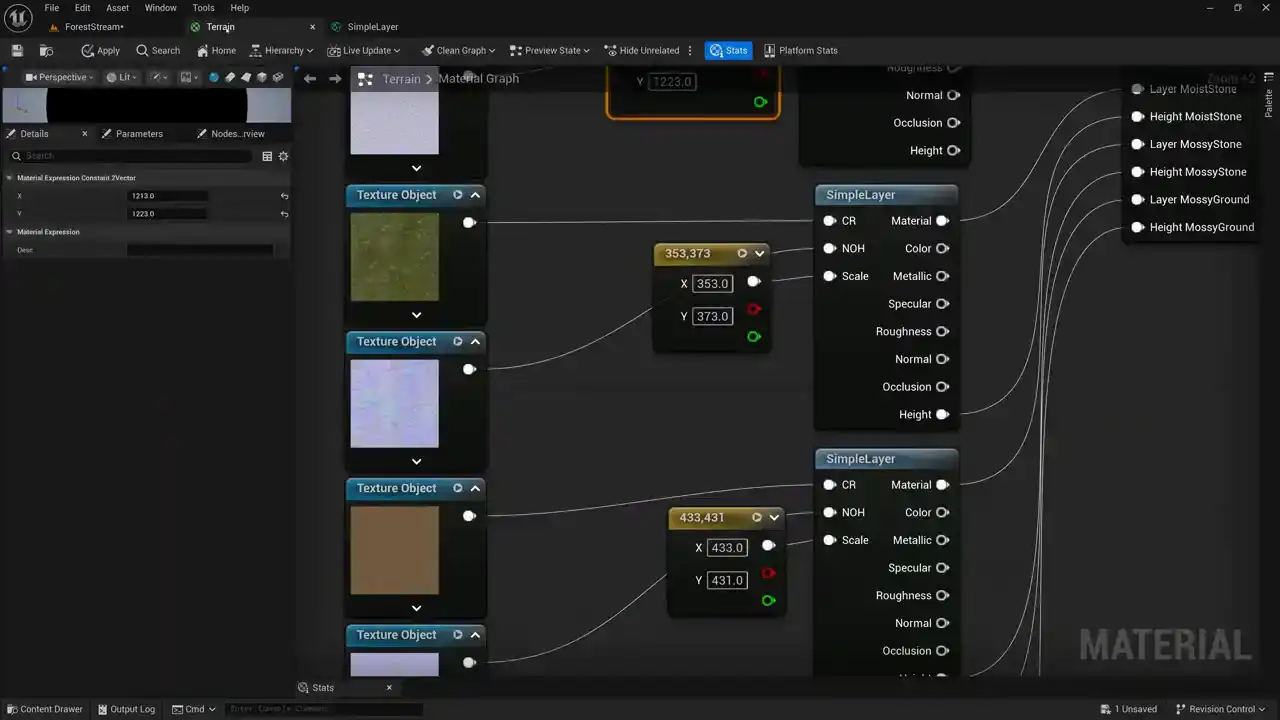
are prime numbers. And I want to explain why I'm doing that. So I kind of got a ballpark of the size that I wanted the material to be. And then I found a prime number that was around that same size. And the reason that I'm using prime numbers is I don't want the tile grids of any of
my layers to line up. And the reason for that is I can blend between one layer and another and cover up the tiling of one layer with the tiling of another layer.
So where my layer painting is happening, there's a lot less repetition and tiling artifacts because my layers are working to break the tiling of each other up so that the tiling of one layer is covered by the tiling of another layer and their grids don't align because I'm using prime numbers that aren't divisible by each other
to scale the size of the grids. And so all I did is just Google a chart of prime numbers and then look for a prime number that was closest to sort of the ballpark of the scale value that I wanted to use. So you can see here I'm using values in the 300 range, values in the 400 range, values in the 600 range. So they're all slightly different scales, so different grid sizes, but also prime numbers. So their grids are not divisible by one another, and they won ever line up So that the overall structure of terrain shader We create the individual layers and then we blend those layers together using the landscape layer blend node Then we split the material attributes apart and pass them back into the terrain base node there. It's pretty simple, but again, you know, this is like the most basic kind of terrain.
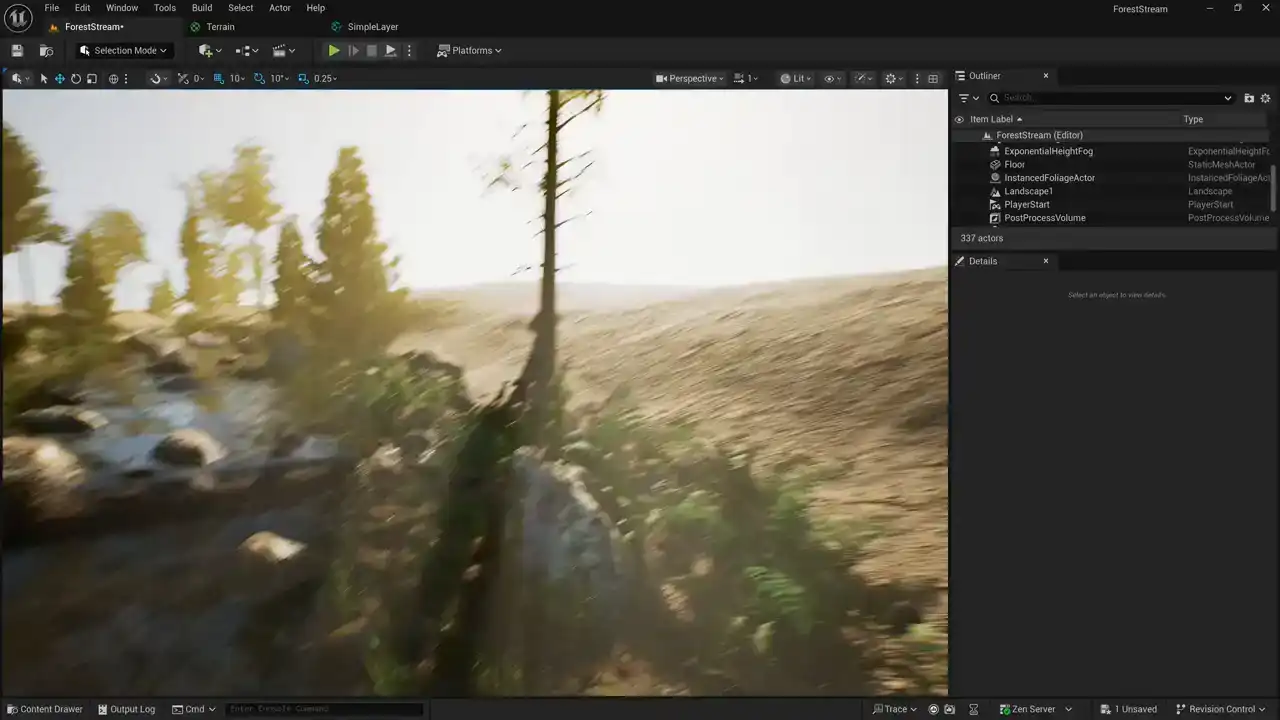
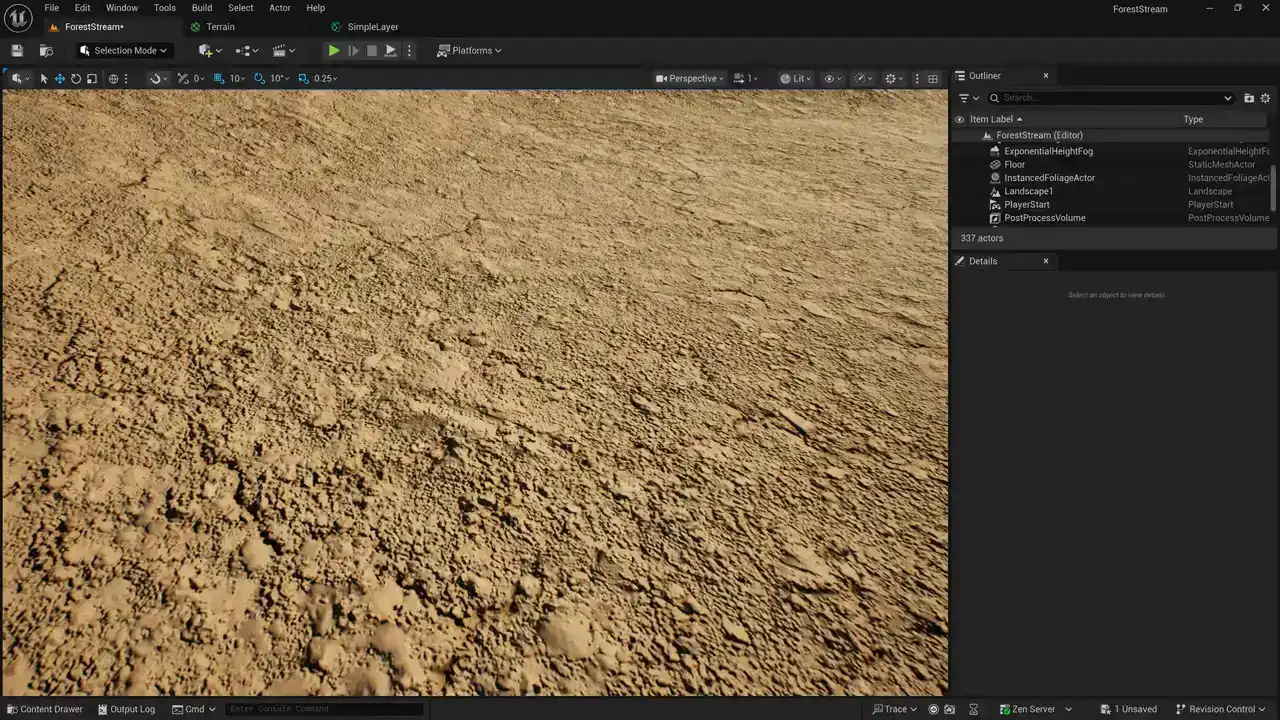
and one of the problems that we can see here if we zoom out a little bit is that our material looks repetitive so you can see the individual tiles repeating over and over and so we're going to talk about next week is how to break up this tiling I have a bunch of different methods for doing this but we're going to look at one method specifically but before we do that let's go ahead
and switch over to unity and i'll show you how to create something similar there and we'll take a
look at terrain shader structure in unity all right here we are in unity and we're going to go
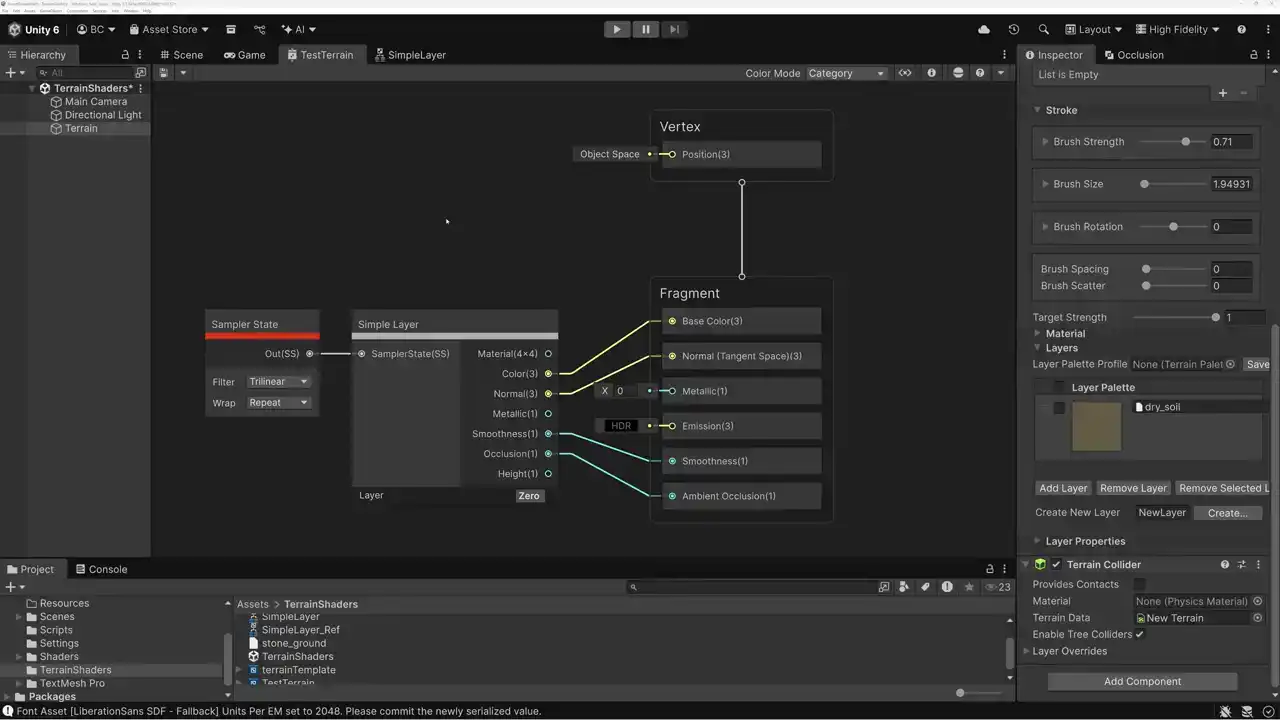
over the structure of a terrain shader so what we did last week is create this simple layer subgraph and what we're going to do today is duplicate this subgraph so that we can make multiple copies of it and then blend the layers together so this represents a terrain shader here that just has one layer but let's go ahead and duplicate our layers and then i'll show you how to combine them all right so here is our first layer and you can see that i've got it set to layer zero here so i'm going to copy and paste this and instead of layer zero here i'm going to pick one then we'll paste another one and for this one i'm going to drop it down and pick two and then for my fourth one i'll pick layer three so i've got layers zero one two and three and you can see that i've got the same sampler state plugged into all four of them so all of the the texture samples are using this same trilinear and repeat sampler state. Okay, so each of these layers has its own material coming out here, and I just need to blend the materials together. And just like we did in Unreal, we're going to use height-based blending so that the height of the material will determine how it's blended with the next layer. And in order to use height-based blending in unity i need to use a specific kind of blend node to prepare my height data because each of my layers has height data coming out but i need to prepare that height data and then i need to use it to pre-multiply my layers so let me show you how to do that i'm going to open up the create node menu and come here to the terrain portion of the menu. And I'm going to come down here to the blend category. Let's see, I need the layer blends category. And I'm going to use this node called height based splat modify. So I'm going to go ahead and add this node here. And now what I need to do is plug the material into each of these four slots. So I'm going to plug my first layer, my second layer, my third layer, and my fourth layer here. And now the last pin here is my layer mask. So I need to go ahead and create my layer mask. So let's do that. I'm going to add a terrain texture node again. The terrain texture node is the one that we use to bring in all of the parameters from the terrain. And here's a texture coming in. And down here I can pick what kind of texture I want. So in this case, I want to make sure that it's the layer mask texture that I'm bringing in. And then we need to sample that texture. So I'm going to add a sample texture 2D node to sample our layer mask. Now remember the layer mask in red green blue and alpha has the 0 1 2 3 and 4 mask layers on it And I want to add a different sampler state for this one So I pick the sampler state node and I want to make this set to linear, and instead of repeat, I'm going to set this to clamp. So I'm going to plug this sampler state in here, and now I'm sampling my layer masks. So let's go ahead and minimize these. just kind of clean up the graph just a little bit. And so my layer masks are coming out of here, zero, one, two, three, and four. But I can just plug those directly into my layer mask input on my height-based splat modify. And what this is going to do is it's going to give me layer masks for layer 1, 2, 3, and 4. So I passed my layer masks in here, and these masks are getting modified by the height of each of the layers, and now I can use them to combine the layers together. So let's go ahead and do that. I don't need these nodes to be expanded anymore, so I can go ahead and just minimize them and shrink them down and kind of stack them close together. So they're not taking up quite as much room on the graph. And then coming out of this node here, I've got the four different blends that I need to blend my nodes together. So let's go ahead and do that. We'll open up again the terrain category here. We'll go to layer blends. And this time we're going to use the pre-multiply layer node. and so i can pass my material into the pre-multiply layer and then pass my mask in and i need to do this for each of the four layers so i'll go ahead and create a pre-multiply layer for each of these and pass in the correct mask So here's my third layer and my third layer mask, and then my fourth layer and its mask. And what this node here, this pre-multiply layer is doing, let's just open this up and we can come in and take a look at it. So it just takes all the layer data and multiplies it by the mask, and then puts it back together into a matrix and passes it out again. So pre-multiplication, you're basically just taking the mask that determines where that layer should show up and multiply all the data in that layer by the mask. And once you've done the pre-multiplication, then blending the layers together is just a matter of adding them because everywhere the layer is not going to be is going to be black, and everywhere it is is going to have the layer data there. And then you just need to add the layers together. So again, I can come here to the terrain menu to the layer blends and we're going to use this blend layers add and I can just take the materials out of each of the pre-multiply layer nodes and then just add them together. So those two layers are added. Let me just scoot my nodes over here and give myself a little bit more room. So those layers are added, and now I need to take the result of that and add another blend layers add node. And we're going to blend it with this next layer with the third one. And then do it again with the fourth one. and now we've got all our layers pre-multiplied with each other and then added together. So let me clean this up just a little bit. And then finally, this last node here, we've got our materials coming out so we can just we can just pass the results of these into the master stack So I take my color my normal my smoothness and my occlusion And there we go. Our terrain shader is complete, or at least the most simple version of one. So here I've got my four individual terrain layers. And then I multiply the height of those layers by the layer mask here. And then I use that mask to pre-multiply the layers, and then I add the results together, and then I split out the parameters and pass them into the master stack. So if we save this, now we have a terrain shader applied in our scene that we can use to paint the different materials. Now, currently our terrain actually only has one layer assigned to it. So if we want to use this, we need to add a couple of other layers. So let's go ahead and do that. All right. I went ahead and added these four layers and now I can use this palette here and I can select the layer that I want to paint. So let's say I want this ground rock grass fells dirty and I can paint it and it's going to add that layer on top of the dry soil layer that I already had now you can see that my layer mask is fairly low resolution so if I want to fix that if I want to have more resolution I can come up here to the top and switch over to my terrain settings panel and then come down here and set my I think it's the control texture yeah the control texture resolution so right now it's just 512 let's go ahead and crank it up to 2048 and now when I switch back to my paint tab again I should be able to paint with a little bit higher resolution yeah you can see that my my texel density on my mask is a little bit higher. So I'm able to paint my different layers and just select a layer and paint it on. And you can see that my shader is working great. I've got my four different layers here and I'm able to paint each of the layers and just put these materials wherever I want them to go. and everything's working just the way that I need it to. Now, one thing that you may notice is that there's a lot of tiling. And it's not so bad right here where I'm painting all the different materials because I'm able to break up the tiling with the four different materials themselves. But if I get to an area where there's a large section of just the one material, that material is going to be repeating quite a bit. So next week we're going to talk about different ways of breaking up that tiling, starting out with something really cheap and then getting a little bit fancier. But we're going to do some terrain tile breakup techniques next week. So I hope you come back ready to learn about that in next week's tutorial. Thank you so much for watching. Today we went over the structure, the overall structure of a terrain shader. We talked about our different layers, duplicating the layers, combining the layers together, using height blending and using additive here in Unity. And in Unreal, we used height-based blending as well. So I hope this was useful. Let me know down in the comments if you have questions or if you appreciate this content. Thanks so much for watching and come back next week for some more terrain and landscape shadery goodness. Have a great week everybody.