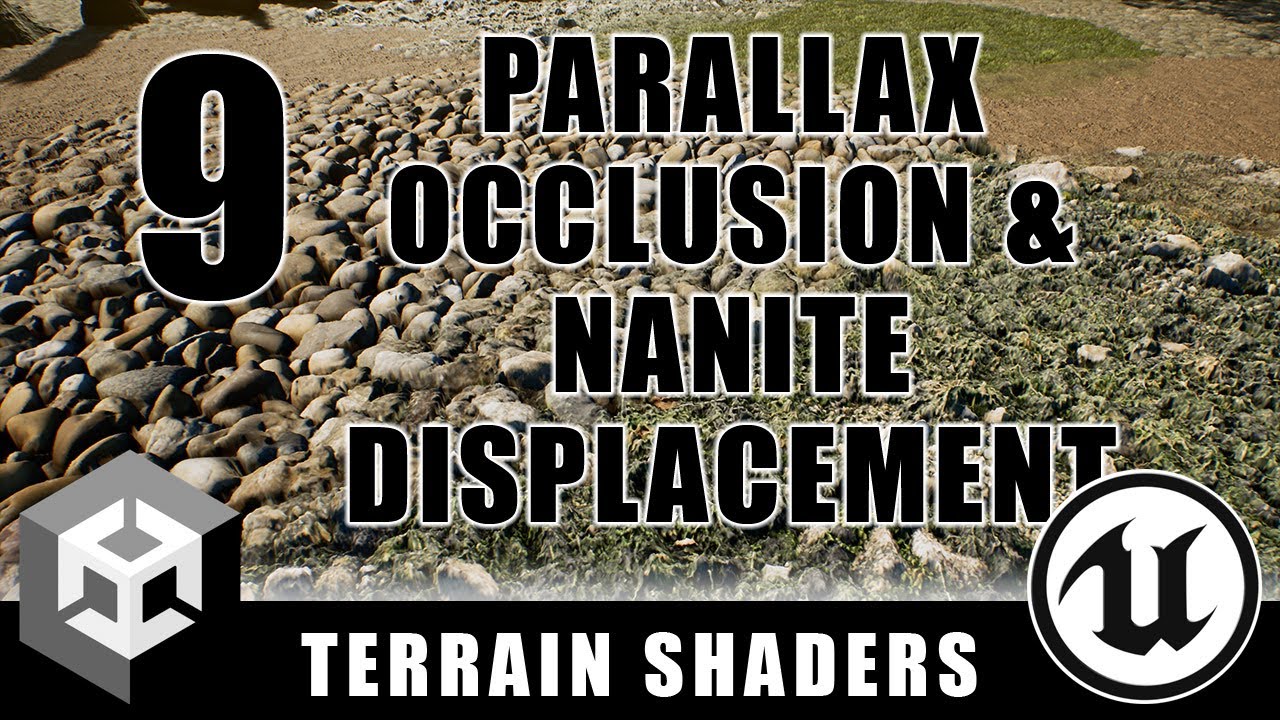
Today, I'm going to show you how to use Parallax Occlusion Mapping in Unity and Nanite Displacement in Unreal to add extra depth detail to your terrain. Let's go! Alright, so we're in the middle of a series of videos on creating terrain shaders in Unreal and Unity. So far, we've covered all kinds of cool topics in this series, like projecting terrain materials onto steep slopes, breaking up terrain tiling artifacts, and how to make terrain cheaper to render. I've linked the whole playlist down in the description if you'd like to see the other videos in this series. So today, I'm going to show you how to add extra shape and depth detail to your terrain. And usually, I like to show the same thing in both Unreal and Unity. But today is a little bit different, mainly because in Unreal, I'm going to be showing you how to use Nanite Displacement, and Unity doesn't have anything like that. So in Unity, I'm going to show you how to use Parallax Occlusion Mapping instead. Both techniques are fairly expensive, so you'll want to be careful how you use them. as we go along i'll show you some ways of making them cheaper to use all right so let's go ahead and get started making parallax occlusion mapping on our terrain in unity first then in a minute we'll switch over to unreal and i'll show you how to use nanite displacement okay so what we're going to do is we're going to create a new type of terrain material layer that as that has parallax occlusion mapping in it. So I'm going to take this simple layer subgraph here that we've created in a previous video, and I'm just going to duplicate it, and then we're going to add parallax occlusion mapping to that. If you haven't seen the video where I created the terrain simple layer, I think maybe it's episode one or two, be sure to go back in the playlist and check that out so you won't miss anything. Okay, so I'm just going to right click on simple layer, and we're going to actually I'll just copy and paste it. And instead of simple layer, we're going to call this parallax occlusion layer. And I'll open up our subgraph and we can jump right in and start adding to our layer. So you can see that I have two texture samplers here, one for our color and smoothness texture and the other one for our normal occlusion and height texture. And here I'm passing in our UV coordinates. And what we need to do instead is move these nodes here out of the way because we're going to add our parallax occlusion right here in the middle. And by the way, in Unity there are two different ways of doing parallax mapping. So if I just type Parallax, you can see that there's one node called Parallax Mapping and another one called Parallax Occlusion Mapping. And we're going to be looking at Parallax Occlusion Mapping today, but if you want to make a less expensive version of this technique, you can use the Parallax Mapping node instead. Just swap it out for the Parallax Occlusion Mapping node that we're using. Now I will warn you that parallax mapping doesn't look nearly as realistic. And so if you use that one, just be prepared to probably be a little bit disappointed with the way that it looks. So we're going to add the parallax occlusion mapping node. And this node has a lot of inputs here. And so we're just going to kind of go down this list and fill out these or connect up these inputs. And I'll kind of explain to you what each of them is doing. The first thing that we're going to do is take our normal occlusion and height map that's coming in here, and we need to plug that into our incoming height map texture, because that is the texture that has our height in it. Our second texture is storing our normal map, our occlusion, and our height, and the height's in the alpha channel. So I want to make sure that I take our Parallax Occlusion Mapping node here and set it to Alpha Okay we also want to create a sampler for the Height Map Sampler We have a Sampler State node here already, so I can just plug our Sampler State in. Now, if you want to make this Sampler State higher quality, if I select this and bring up our Graph Inspector here, you can see that I have my sampler set to trilinear and 16x anisotropic. And that's really high quality. And we might actually want to sample our depth map or our height map with lower quality. So I think what I'll do is just create my own sampler state that's unique for this. And we'll just go ahead and set it to linear. And if we come over here, you can see we have anisotropic filtering set to none. And that's a way that you can make the height map sampling cheaper for this particular node if you create its own unique sampler state and give it lower quality. And the lower quality isn't really that noticeable because it's sampling height. It is noticeable for these other two textures, though. So I think this is a good optimization that we're doing to make a unique sampler state for our parallax occlusion height that we're sampling. Okay, the next thing that we're sampling or the next thing that we need to connect up here is our amplitude. And that is the amount of height that we're using. And so what I'm going to do is come over here to our blackboard and I'm going to create a new float. And I'm going to call this max parallax height. and I'm just going to go ahead and connect it up right here to our amplitude. And I think this looks pretty good with a default value of six. And so I'm just going to give it a default value of six. Okay. The next input port here on our parallax occlusion mapping node is steps. And this is the number one most important value that you want to control for how expensive your parallax occlusion mapping is. If you just type in a hard-coded number here, you're leaving a lot of performance on the table and you're going to waste, and it's going to be a pretty big waste. You want to very carefully control the number of steps that parallax occlusion mapping is using so that you can get the best performance possible. Let me give you a couple of examples. if you're zoomed out far away from your actually let's just jump out here and I'll show you in the scene if you're zoomed out really far away from your material you can't really see the parallax occlusion mapping that's happening there and so you're going to want to make sure that as you move further away from your material the further away the camera is the fewer steps you want to do in that calculation. And let me just explain. The number of steps is basically the number of times you're sampling your height map texture in order to create the parallax occlusion. So the more samples your shader has, the more expensive it's going to be. So as we move away from the material, you're going to want to reduce the number of samples that you're doing. And there's also another case where you want to reduce the number of samples. If you're looking straight down at your material, you can't really see the parallax depth there. Where you're going to want the parallax depth is when you're looking at it kind of from the side, from a glancing angle. And so what we're going to do next is add in a series of nodes that will control the number of steps based on the angle that you're looking at the terrain and also how far away from the terrain you are. And this is going to improve performance significantly. So make sure that you don't skip this when you're making your parallax occlusion terrain layer. And what I'm just going to do is copy and paste because it's kind of a big number of nodes that we're going to be adding here. I'm just going to copy and paste these in, and then I going to go over them one at a time so you understand what happening So here is our nodes that we adding and this top series of nodes is a mask that based on the distance that the camera is from the surface. And then this bottom series here is looking at the angle that we're looking. Are we looking straight down at the terrain, straight at the terrain, or are we looking at an edge on? So let's go over these one at a time. Our view vector is a vector that goes from the camera to the surface, and we're getting the view vector in world space. And then we're finding the length of it. And that basically tells us how far away from the surface are we. Then we take that and we multiply it by 0.09. And then we saturate the result to get a mask that's between 0 and 1. And then we raise that mask to a power of 0.45. And that's going to just kind of cheat the detail toward the camera a little bit more. And then we invert the mask. And this series of nodes here is going to control our steps based on how far away from the surface we are. All right, our next series of nodes is going to create a mask for us based on our angle. So we take the normal vector of the terrain, which is basically telling us which direction the terrain is facing. And we do a dot product between the normal of the terrain and the view direction that we're looking. So this is basically the angle of the camera. So the angle of the camera and the angle of the terrain. Do a dot product. And then we saturate that. And then we invert it with a 1 minus node. And then we square it by multiplying it by itself. And that series of nodes right there gives us a mask that tells us what the angle is between the camera and the direction the terrain is facing. And then we multiply this by a hard-coded value that's going to give us the maximum number of steps that we want to use. So let's actually add a Blackboard parameter here, and I'm going to call this max parallax steps. And I'm just going to default this to something fairly high. I think I'll default it to maybe 128. But the thing about this is this is the highest it can possibly get, and it usually won't be that high because we're multiplying this maximum number of steps here, maximum parallax steps, by both the angle to the surface and also the distance to the surface. So we multiply both of our masks together, and then we add this ceiling node, which rounds up to the nearest whole number. And so we can take the result of all of this and plug it into our steps. And what that's doing is it's ensuring that we never use more steps than we need. So we're going to be able to, as we pull back away from the surface, the steps will be reduced by this part of the graph. And as we have a really shallow angle, we'll give ourselves more steps that it can look more realistic. But then as we look kind of more directly onto the terrain, this part of our mask is going to reduce that. So we're not calculating as many steps so that our parallax occlusion mapping is less expensive. And just trust me on this. I've tested it and doing this really, really improves performance. All right. The next thing that we need is our UV coordinates for our parallax occlusion mapping. And we've already calculated our UV coordinates right here. so I can just take the output of our tiling and offset node and plug it into our UVs right there. Now the parallax occlusion mapping node has tiling and offset built into it and I'm really not sure why because we already have tiling and offset here and so I'm just going to leave tiling and offset to 1 and 1 and 0, 0. We don't need to touch those and in fact we don't really need to touch these other properties either So I just going to leave them exactly as they are Okay So the next thing that we need to do is take the UVs that our parallax occlusion mapping node is creating and plug them into our textures So we're creating UV coordinates there, and we're also creating UV coordinates here. And now that our textures are being sampled by our parallax occlusion mapping UV coordinates, we should be good to go. Let me just kind of double check everything here. And so now we can take this new terrain layer type that we've created and just go ahead and plug it into our terrain shader. So I'm going to save this and we're going to switch over to our terrain simple shader that we've been working on. Okay, so here is the terrain shader that we've been working on. You can see that we've got four different layers here. Last week we worked on this triplanar layer that projects materials onto steep slopes. and a couple of weeks ago we worked on this layer iq tile break that breaks up texture tiling well today we're going to take this last layer here number four and we're going to replace it with the parallax occlusion layer that we just created so i'm going to come down here to our project window and we're going to grab our parallax occlusion layer and drag it in And we just need to connect up our parameters. So we have our max parallax height parameter that we're going to connect up here. And we have our max parallax steps. We have it set to 28, 128. You can tune this to however you want it to be. In fact, let's go ahead and create a parameter that I can hook up. and I'll show you what it looks like when you have a different number of steps. So I'm going to create a parallax steps parameter, and we can plug this in, and we'll default parallax steps to 128. But we'll take a look and set this to a couple of different values so I can show you what happens. Okay, and now we need to hook up our material output here so that it goes into our blending there and our height-based splat modify there. And we'll place our parallax occlusion layer right there and save it. And now we should be able to switch over to our scene and take a look at our results. ah one thing i forgot is we need to make sure that we have our drop down here and we set it to layer three so that we get the right material coming through yeah great perfect okay let's open up our material parameters so that we have a floating window here and we can adjust these things. If we adjust our parallax height parameter that we hooked up, you can see, you know, this is what it would look like without any parallax mapping. But then as we dial this in, you can see, oh wow, it just adds a ton of depth and it looks significantly more realistic. Now, as I said, as we move further away, those masks that we created will reduce the number of steps and make the material less expensive as the camera is further away. And also, as the camera is looking straight down at the material, it's also going to reduce the number of steps there. And so we're going to have more steps as we look at this kind of from a glancing angle like this, and fewer steps as we look straight down at it like this. So if we're looking at it from the side here, If we look really closely right here at this part of the screen, you can see that there's a little bit of a striation effect happening. And that's the artifact that we get when there aren't enough steps. Right now, because we're zoomed in so close, we can actually see the individual steps. And so if we want to fix that, we need to increase this. I'm just going to set it to like 256. And you can see it's still there, but it's not quite as good. bad. So maybe if we set this to 512, yeah. So the more steps we have, the smoother this is going to be and the less artifacts we're going to get. But it's also going to be significantly more expensive to do this parallax occlusion mapping. So you're going to want to be careful with your number of steps. You might be able to get away with something as low as 16, just depending on how close you get to this surface. You can see here as we set it to 16, if we look at this kind of at a glancing angle like this, the effect kind of falls apart. So you have to be careful and find the right balance between the maximum number of parallax steps and the quality that you want on your terrain. You kind of have to carefully balance the cost that you're willing to pay for this terrain and with the number of steps that you're doing. So you want to use as few steps as you can get away with. And also remember that what we did in the shader to reduce the number of steps based on the angle and also based on the distance will help performance a lot. Okay, and then the one other thing to be aware of is you want to not use this effect on all of your terrain layers. We have this kind of mossy grass layer over here, and it has significantly less depth than our cobblestones that we have over here. And so you probably would not want to use parallax occlusion mapping on that layer. It would just be a waste of performance because it's a fairly flat and depthless material and so you want to make sure that you only use parallax occlusion mapping on surfaces that have really interesting height maps that will actually make a difference and that'll save you some uh some performance in your terrain shader if you take a look at our terrain shader you know we have several different types of layers here we have a layer that is specifically for projecting on slopes. We have a layer that's breaking up tiling. And we have another layer that is doing parallax occlusion mapping. And this is all kind of planned based on the needs of the materials that are in those layers. And this is the best way of saving on performance and also getting a good quality. You want to take a look at the material that you're going to be putting into that layer and think, do I need tile breakup for this material? Is this material projecting on slopes? Do I need parallax occlusion mapping or some kind of effect to emphasize the shape of these objects and use a layer subgraph that only does the properties that that particular material layer needs. And that way you'll have a good balance between quality and performance and you'll have a terrain shader that's specifically crafted for the materials that your terrain is using. That is definitely something that I recommend as you're creating your terrain shader. All right, so that's how you do Parallax Occlusion Mapping in Unity. Let's switch over to Unreal, and I'll show you how to set up Nanite Displacement there to get a similar effect. okay here we are in unreal and in unity we added the extra terrain shape detail using parallax occlusion mapping and in unreal we're going to use nanite displacement and what that's going to be doing is it's going to be taking our terrain and dividing it up into millions of tiny little triangles and then we're going to displace those triangles using our height data. So instead of tracing rays with parallax occlusion mapping, we're actually creating geometry and displacing that with our height map. So I'm going to show you how to do that in Unreal today. You can see that I've painted a couple of different terrain materials in patches here so that we can see how they overlap and how they interact with each other Our terrain dirt and kind of mossy rocky ground here are overlapping in this region and you can see kind of how they blend with each other And same thing with our dirt and our moss here. You can see how they blend with each other. This is something that I definitely recommend that you do before you start getting really in detail in painting your materials onto your terrain. Just kind of lay them out in these little spots like this and make them overlap. And then adjust all of the values that you are inputting. Tweak your textures and make things work so that the terrain materials blend really nice with each other before you start painting them all over your terrain. Okay, well, let's go ahead and i'll show you how to turn on nanite and how to make this all work the first thing that you want to do is come up here under the edit menu and pick project settings and you want to come down to the platform section and whichever platform you're working on by the way this is not going to work on lower end platforms so there's a bunch of android and ios and platforms like that you're not going to be able to use nanite on those so just don't even try we're going to come here to the windows section and here we have sm5 and sm6 what this is sm stands for shader model and this is a version of the shaders that are being used shader model 5 is a more primitive shader model and nanite only works in shader model 6. so if your project is using shader model 5 you want to switch it to shader model 6 and then also make sure that your default rhi is set to direct x12 nanite requires these two things to be set so be sure that you have those set up in your project settings before you try to turn on Nanite. So by the way, yeah, I just want to kind of drive this point home that this feature is high-end only. So only like PlayStation 5 level consoles and high-end PC are going to want to use Nanite. So if you're making a mobile game in Unreal, I definitely recommend against this. Okay, so we've got our project settings set. The next thing that we need to do is come in here to our material. This is the terrain material that we've been making. We created it for the last couple of weeks. We've got our cobblestones layer here, our moss layer, our dirt layer, and then kind of our rocky mossy layer there. And you can see here that we're bringing all of our layers together in the landscape layer blend node and then and we're using a height based blending so here is our blend type we've set it to height for all four of our layers and then we're passing out the results of our material and then we had this get material attributes to kind of split out all of the attributes that we created one thing that i had to do is on this get material attributes node, I needed to add another entry down here at the bottom for displacement so that our displacement is being passed out. The displacement is the height data that's coming from our material. Let me just kind of, let me jump into our layer material here. and you can see that we're sampling both of our textures. This texture has our color and our roughness and this texture has our normal occlusion and height and the heights in the alpha channel. So if we take a look here, we're passing our height out as displacement there and we're also passing it out as our height output there. So if we come back and take a look here, our height data is in our material wire right here, and it's also being passed out of our height output port right there. So this node will blend all of our layers together, and then this node will output our displacement here. And the displacement now needs to plug into our root node but you can see that displacement is grayed out down here at the bottom So what we need to do is with our root node selected we need to come over here to our properties and scroll down and check this box that's called enable tessellation. So this is going to allow Nanite to work with this material. And now that that box is checked, we can drag out our displacement and connect it up right there. And that will pass our height data that we've blended together from all of our layers out into the root of the shader. And by default, our magnitude value is set to 4. So when I first turn on Enable Tessellation, that's going to be set to 4. And I've found that 4 is way, way too high. And so I went ahead and just toned that down and set our magnitude to 0.25. And you can set that to whatever you want. And then our center value is, so our height map is a value between 0 and 1. And this center value determines where the center between 0 and 1 is. If it's 0, the height is only going to be pushing the terrain up. And if it's 1, it's only going to be pushing the terrain down. But if we set it to 0.5, then any values in our height map above 0.5 will push the terrain up, and values below 0.5 will push the terrain down. And center is a pretty good way of doing things, so I just left it at 0.5. Okay, so now we can save our terrain material, and we'll jump back to our scene. and you can see that we still don't have any Nanite displacement. And that's because we actually have to turn Nanite on for our terrain as well. So I'm just going to click on our terrain. And now we can come down here in our parameters and turn on enable Nanite. So I'm just going to check the enable Nanite box. And then we also have to click on this build data. And that's going to generate our Nanite triangles for us. So I'm going to click build data and this takes a little while. So we're going to have to wait for a minute. All right. So Nanite is now built and you can see that we have some really nice looking height displacement happening. If we zoom in here, if we get too close, you can see the individual triangles and things start stretching a bit. So, you know, obviously you'd never look at your terrain from this close. But if we're back here at a kind of a reasonable distance, you can see that Nanite is adding some really great shape to our terrain. And we're able to get some much more realistic looking shapes on our terrain using Nanite Displacement. Now, if we come up here under this menu that's called Lit, we can come down here to Nanite Visualization. And if I switch here to Triangles, you can see every single individual colored pixel here is its own triangle. And so Nanite is just creating millions and millions of triangles, which is a little bit insane, honestly. But that's just the way that Nanite works. So there you go. Alright, so you can see that Nanite has significantly improved the visual quality of our terrain by adding these really nice shapes, detailed shapes, to the terrain. and one thing that i want to recommend a lot of people might tell you that it's a really good idea to be able to adjust your height so for example if you wanted your your cobblestones material here to be a little bit bumpier and your mossy rocky material here to be a little bit smoother They would say that you should go to your terrain and add a bunch of parameters here for adjusting the levels of your height or the contrast or that kind of thing. What I would recommend instead is that you apply those adjustments directly in the height map textures themselves And why would I recommend that It significantly more work to have to jump out and you know open your height map in Photoshop or in Substance Designer or however you edit your textures and make adjustments. But the reason that I'm recommending this is because if in your shader here, you're adding a bunch of parameters to adjust your textures in real time, that math is happening in real time for every pixel, for every frame, when it really only needs to happen once. You just need to make that adjustment once and get that height map to where you want it to be. And I recommend that you do that offline, not in your shader, so that you're not doing those math calculations all the time. So what I've done to make these materials look nice is I tuned the height map and the specular and the occlusion, all of those things in the textures themselves using Substance Designer. And you can use whatever image editing software you like. But I tuned those manually myself. And now my shader doesn't have to do all of those extra calculations. It is a little bit more work and you have to do a little bit of back and forth and re-importing the textures and such, but it ensures that your terrain shader is as cheap as it can possibly be. If the data that you're passing in from your textures is already set to where it needs to be and you don't have to do a bunch of math, every pixel, every frame in real time to adjust those values. Alright, let's come over here to our river and find some cool views where our displacement has made a nice difference for us. If we take a look at our riverbank here, you can see that these rocks are bumping up really nicely. And that makes them blend in with our ferns. And if we come down here to the mud on our riverbank, the mud displacement is kind of subtle. But here, if you see the shapes of our pebbles in our stream, wow, this is looking really nice. So Nanite Displacement has made a big difference on our terrain and improved our visuals so that we get a little bit more realism in what we're doing. And unlike in Unreal 4, where we are doing tessellation and displacement and it costs a lot, I think that Nanite displacement is actually more efficient and cheaper to do. I haven't actually compared them. When I was doing my series on world building in Unreal 4, we turned on tessellation and displacement and I showed you how to do that. and then eventually I ended up turning it back off because the tessellation and displacement was adding so much cost to the to the terrain but I think that they've optimized things and nanite displacement is significantly cheaper I don't know for sure I haven't tested it myself but I think that it is actually for high-end platforms, high-end PC and consoles. I think that it actually is reasonable and you can go ahead and turn it on and it'll work just fine. Like I said, I haven't tested it, so don't quote me on that. But I think that they've gotten Nanite terrain tessellation to a point where it is cost effective and cheap enough to use all right thank you so much for watching today i hope you enjoyed today's tutorial um next week we're going to continue on our journey where we're adding new features uh new bells and whistles and i'm showing new techniques for creating terrain and landscape materials so be sure to come back for uh next week's tutorial and in the meantime have a great week everybody