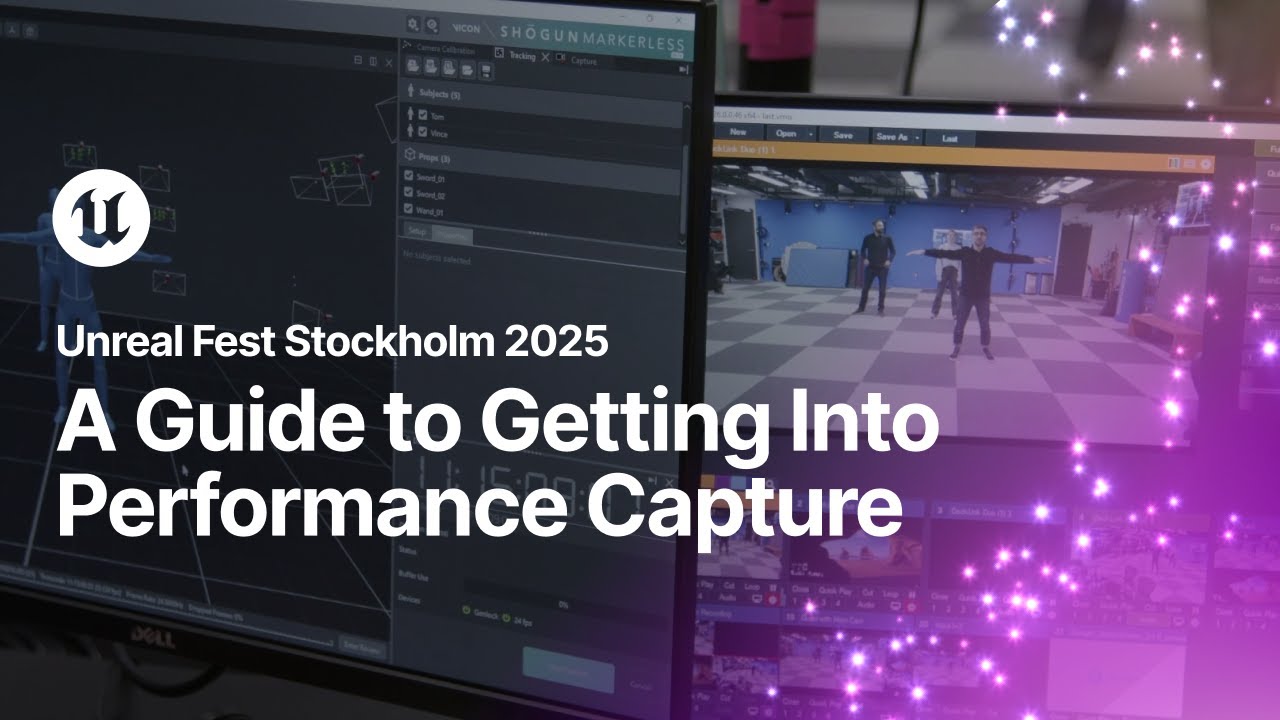
Hello, everyone. Cool. I'm Ben Kidd. I'm based in London, out of the Epic London Lab, and I'm a solutions architect for media and entertainment. And I thought I'd like to learn a little bit about you first. So, can I get a raise of hands for games industry? Okay, thank you. media and entertainment film, TV thank you and then let's try any architecture okay automotive simulation anyone else want to shout what I'm missing sorry okay thank you that's really useful alright so previously In the previous years, I've been really focused on ICPFX. And in the last 12 months, I decided to get into motion capture. And I learned a lot. I've worked with some fantastically talented people at Epic, and I had the privilege of learning from them. And I wanted to echo that back out into the community and thought this would be a nice thing to bring to Stockholm. And so the objective here is to get you guys into performance capture, which I assume is why you're in here. Cool. So here's how we're going to do it. I will kick off with a bit of an overview of the state of performance capture and motion capture. And I'm going to use those terms interchangeably. So forgive me. And then we're going to move on into a practical demo. It's going to be a lot of information in that demo and it may be it will feel like a tutorial. But actually what I'm just trying to do is in a very short, compact space of time, just kind of like give you a view of the whole workflow. And so if it feels like a lot of information, just like let it wash over you. Don't worry about the detail too much because I'm going to be providing you with a digital goodie bag that you can download that's going to allow you to recreate everything you see in that demo in the comfort of your own space at your own time with information and further links. And of course, this talk will be on YouTube. So hello, future. We're on YouTube and you can scrub and pause and do things and rewatch this. so if it does feel like there's a lot of information it's good, just let it wash over you like I say so first things first, let's get into the anatomy of performance capture and I think what we'll start off with is looking at the different types of performance capture body solutions that we have so first, let's look at inertial suits the way these work typically is that you're wearing a motion capture suit with sensors in that are taking various data, accelerometer and gyroscopic. And from that across your joints, the solver is able to work out what your body was doing. And because you're just wearing a suit, they're fairly compact and convenient. You don't have, like you saw outside, a truss with external cameras. And they can be really quite quick to set up. I've got a Rococo at home. and I have it at home precisely because it's perfect for just throwing it on quickly and doing some performance capture in my office. So there's some real advantages there. And next is Markerless, which you can see this week over on our voice-to-visual stage. And Markerless does what it says on the tin. You've got no suit or markers on. and that actually opens up not just the convenience of not having to put a suit on, but unique use cases. So for example, if we were doing a virtual catwalk for fashion, well, we can't wear a motion capture suit because we're no longer wearing the fashion that we want to be demonstrating. So it's also really cool for live events. And then maybe for people that work in animation, because of the very rapid acquisition of both of these classes of motion capture solution. There's an opportunity here to use those rapid acquisition, easy accessibility, along with our tools to very quickly capture a bunch of animation that may be thrown away in the pipeline but is useful right now. So instead of performing in front of a camera and recording and having that as reference, just wander down to the meeting room or wherever you've got one set up and quickly just capture some stuff and then go back to your desk and work with it. So I kind of think that that's quite an exciting change of late. Next, we've got optical marker systems. These are where you would have typically seen in behind the scenes for movies. I'm not playing these videos, sorry. so we've got Matt Workman here obviously in a Vicon suit and that's solving in an incredibly absolute and accurate way so these give you the most accuracy to the point where they're used in life sciences and sport and in big feature films but because of that there's a little bit more set up time but the juice is worth the squeeze if what's important to you is incredibly accurate data and so the typical names of vendors for these solutions in the inertial seats is Rococo and XSense and Perception Neuron which Rococo are here so if you see Sam wandering around he's this is Sam in the video so if you see that chap go and say hi and then Markless Capturey obviously here, Alex from Capturey is here if you want to go and say hi and then there's MoveII Radical Motion and Vicon Now, interesting that I've got Vicon in here as well. Okay, I'm going to come to that in a second. But in the optical marker group, we've got Vicon, Optitrack, and Qualysys. So if you are interested in any of these systems, they're the folks to reach out to. Now, back to that point about there being Vicon in two categories, for example. Hybrid markerless is now a thing. It didn't take very long. one of the things that's tricky about markerless systems is it's not necessarily very easy to track a prop and as you can see in this video Matt's using a lot of props and in Vicon's case and this video is courtesy of a collaboration with Framestore you can see their hybrid markerless solution so we have animators that are able to just quickly be captured and tracked but they need props because they're sword fighting. And so you've got the benefits of both worlds here. But more importantly, in one product. So you're not trying to align two different motion capture systems. That's very tricky to do. It can all happen in one solution. So we've talked about body there. Let's talk about face. Again, this is a big area and it's important to get right because if there's no face, you're missing out on a huge amount of the performance. So I'll start here with, I think, the latest and most accessible and highest quality for both of those categories, which is the Rococo head-mounted web camera. This is like a little web camera that's here. And you just pop that on your head and tighten it on. It's really quick. And then as of 5.7, the UE Live Link Face app is now available on Android. So here I am. The benefit of being on Android is Android accepts external webcams. So now I'm live link, wirelessly streaming my face data that's being solved on the phone with an ML chip over into Unreal. So incredibly lightweight. I haven't got, you know, typically we would put a phone here. Then you'd have to counterweight it there and then you move your head and then this is all flinging around. so this is really hot off the press and I wanted to share it with you and if any of you want to try any of this come and see us at the stage and we'll get you set up so this is just like the inertial suits this is at the accessible end and if you are in a bigger production let's say you're shooting a movie for months and there's a lot of motion capture required then you're going to need something a little bit more high end and so this is a captive devices headset it works in a similar way in principle but there's actually two cameras here for stereo and it's being recorded on this wearable computer it supports timecode and genlock and all the other really important things you require on set and it's also streaming one of those cameras to Unreal and so you can do the same thing as the Rococo helmet but you have all the benefits of the offline solve and all of the production benefits of timecode and Genlock as well. It's incredibly robust. And again, if you would like to try this and speak to those guys, Fred from Captive Devices is here and just on the AnimVase, which is just outside that door. So come and check that out. Okay, let's quickly talk about how we get data through a MoCAP pipeline. So we've got a motion capture system and a HMC. We've discussed those. And then via Live Link, which is our data protocol for animation, that data goes into Live Link Hub. It can go straight into Unreal, but we'll just stick with Live Link Hub as a centralized hub for a minute, and I'll show you why. That then, Live Link Hub can send that Live Link data out into Unreal Editor or multiple Unreal Editors. And then that data, we assign it and its animation onto a performer actor class. That is like your digi-double of your actor. It not your creature or character that you intending to animate And via our inverse kinematic tools and our retargeter which for now I going to assume you guys are fairly familiar with but if you're not, in a nutshell, an inverse kinematic solver is how we can move a hand or a leg and have the rest of the joints correctly animate, whereas a forward kinematics is when you're driving bones directly and inside the retarget asset, there's a number of operations that go through and do a beautiful blend between the forward and inverse kinematics and allow that animation from essentially a larger, different-sized proportioned person onto a different-sized proportioned character. So this is kind of like an animation remapping phase, and you'll see that shortly, the benefits of doing that. in the case of our demo that I'm going to show you we're using Capturee with the LiveLink Face app with an iPhone on an HMC and we're also in this case going to be having a Vcam as well because I think it's important to remember that the camera is itself a performer that makes a slightly different path into the engine it's not via LiveLink but just to show you You know, Unreal Engine's tools are agnostic, and just by switching, I just wanted to show you an example that we could just be doing Vicon and captive devices or those other solutions that I showed you. So all of this can be interchanged. So there's a big range of tools that we're going to be using, and I'll be showing you. so we've got LiveLink Hub, Switchboard, Multi-User Metahuman Animator, Mocap Manager, Vcam Inverse Kinematics and Retargeting and Capture Manager and I said there's a lot in this demo and there is but hopefully by the time you've watched me take you through this you'll feel fairly familiar with those things and that won't feel like such a long list I'm showing you a demo that's at the scale of doing it in a Mocap stage or a studio But if you were working on your own at home, you maybe don't need Switchboard and multiuser, for example. And so I'm going to be showing you what a larger pipeline looks like, but you can scale back as necessary. Cool. So let's move over into our practical demo. This is essentially a recording of us in the London lab doing some performance capture. and I've got it in Premiere as an edit that lets me just scrub around and pause. I cheated doing a live demo because I didn't quite fancy setting up a motion capture stage in here. We've already set one up outside. You will see me pause and scrub. So this is the motion that we're going to be producing today. It's kind of a previs grade in terms of quality performance between these two characters. so the demon is going to give the metahuman a high five the metahuman thinks that's intimidating and the demon reacts by lowering its hand and gives a high five but what that looked like in the real world was Elise and Richard not wearing motion capture suits as I discussed earlier and high fiving now you'll notice that Elise is shorter than Richard and we did that on purpose. I mean, we didn't make Elise shorter for this demo. She was already shorter. But we thought that that would be a really good way of, you know, let's assign the largest character to Elise to show off the power of the retargeter. So first things first, we need some LiveLink data and we're going to use LiveLink Hub for that. So LiveLink Hub is a separate standalone application. And essentially, you can just run LiveLink straight into the editor. You'll see us doing that on the stage. But there are situations where you would use LiveLink Hub on its own. For example, it is going to push data across all your machines. So if you've got a large stage with a large number of machines, it's great to just have LiveLink controlled all in one place. Because then the users of those machines don't have to worry about where the LiveLink data is coming from. You don't end up in a situation where someone's using the wrong data. And so what we do in here is we add our Live Link sources, and there's other things we can do like control the time code and the frame rate. And we can also actually record data as well. And that allows us to play back data. So I'm opening this data here. And as you see, as soon as I scrubbed this data, it arrived in Unreal. And it's this type of data that I'm going to be including in the goodie bag. So the first thing you're going to do when you download that is grab Live Link Hub, Import that data. And then you'll have all the data that I'm going to show you today. But we don't want to use a recording for this. We want to go live. So the first thing I'm going to do is add my CaptureE source. So you can see there's unknown, which is the default name of CaptureE data. And then I'm going to add LiveLink face, which is the iPhone that's on Richard's face. And I'm just going to enter the IP address for that. It's all wireless on our network. and here is Richard wearing the iPhone. You can see it's tracking his face. Richard is also the product manager of MoCap Manager, which we've shown you shortly, and Live Link Hub. So he was a good demo candidate. So next thing we want to do is combine these two things. We've got our face and we've got our body, and we're going to use a virtual Live Link subject to combine the two. So face plus body. and in that virtual LiveLink subject we can then combine those. And as you can see, we've now got a new LiveLink source with both of them. It used to be that virtual LiveLink subjects were all blueprinted and it's a much easier thing now. So next is Switchboard on our list. because we want more than one operator for this. So we've connected just now to our local instance of Unreal, which you can see behind it. And you can also now see that it knows what Perforce CL it's on. So we can actually use Switchboard to control the version control of each machine as well. And you can think of Switchboard as like your controller for all of your instances of Unreal and what state they're in. and so now I've just also connected to Editor B. But it does other things as well. You can see we've got the ability to add devices like KeyPro and Motive and Shogun and it's also where if any of you have worked in in-camera visual effects or are aware of it is where we manage our own display devices or large clusters of machines, tens of 20 machines. and so with these other devices we can control recording for example and any other function that's built into their device that's been written for Switchboard and if you'd like to write your own, you can it's just Python we can choose what level we'd like to use and there's a swathe settings what this really does is gives you all the control to put your entire pipeline on Rails which is very important because it's very easy to lose time to an issue that's actually just the wrong box being ticked on the wrong machine. Switchboard allows an individual technician to just put everyone's machines on Rails, which is really powerful. The other thing it's going to do is manage multi-user server and session. And for those of you who don't know what multi-user is, I'll be showing you shortly. but it's essentially a collaboration tool. And so what's going to happen now is we'll launch the other machine, Editor B. Let's just say that that's our technical artist. And we're going to launch Unreal for them into this multi-user session. And as you can now see in the multi-user browser, we have Editor A and B. We're now in the same multi-user session. And what that allows us to do is in real-time collaborate. So there's no risk of like someone can't work in a level because it's now checked out on Perforce. This is all happening via these transacted actions that each user is doing. And so each instance of Unreal is replicating the state of the other. And you can actually see the avatar of that person. They've controlled the time of day and they aren't directing some assets. So next is Mocap Manager, which is kind of the core of the Mocap workflow. you'll need to install some plugins. This is already available in 5.6, so you can go and grab that. And then in the under virtual production MoCat manager, you get this little window that we tend to like to dock up on the top right. And it works in a top to bottom, left to right fashion. And you can see those individual tabs and we basically work down through those. So the first thing we're going to want to do is create a new production and that is your project. So, you know, that is typically going to be the show that you're working on or the game that you're working on. So we'll create that. And then next we'll create a new session and a session is whatever you've defined it to be. So that could be that mocap session that morning, that hour, that minute, that week, however you want to define that. And the reason we do that is because in motion capture, the benefit is you generate lots of data very quickly. The downside is you generate lots of data very quickly. And if it's not tidy, you in a real mess And what just happened here is that Mocap Manager has created a lovely template of folders And not only has it just created some folders for us but everything you do goes in the right folders in the right asset structures And that little asset there that just came up is how you can customize this. So in this data asset, you can completely change this template. So you don't have to use how we've set it up. So next is the stage. The stage is a digi-double of your real-world stage. And there's a demo version available for you in Mocap Manager as a default, which I've just added. And all of our performance capture is going to be parented under this. And what that means is that wherever you want your action to take place in your world, you want to spawn the stage. It's got some really nice features that you can customize. but in this case we've got a grid in one meter squares which helps us just align the real world with the virtual world. So it's a neat tool. So the next thing we want to do is go to our motion tab and let's just check this data is coming in as we expect it. So we can just very easily preview LiveLink data now. We've not done anything else but tick that. So we can see it's not exploding. It's coming in as we expect. It looks correct. This is effectively the Capturey skeleton data coming in. So now that we know that's looking good, let's connect it to our performer. So the performer, as I say, you can think of it as a digi-double of your motion capture performer in the real world. So we're going to choose the skeleton type for the system that we're using, in this case Capturey. And we'll give it a live link subject. and what we need is a version of that skeleton that matches the proportions of the actor in the world so that we can retarget it really accurately. And we've got a nice workflow for that. And so basically we just direct the actor to stand and match more or less the template there and then we just hit the Create, IK, Rig and Mesh button. And that's doing a whole bunch of things that you could have done yourself with a few more clicks, but it's nice and convenient. What that's done is gone and created a proportioned mesh and an IK rig. Once we've done that, we can create the performer. And that then gets added to the list of performers that are available. And we only really need to do this once per actor. So if it's the same actor coming in every day, it's as easy as just loading it up and hitting spawn performer. So there you go. And there's Richard being applied to that captory skeleton there. So next, we've got our issue with regards to the feet floating. And so it was just a case of grabbing the stage and lowering it. Again, as I mentioned, that's the beauty of having a stage. It's very easy to move everything. So we're going to create our character. we'll start with the Metahuman so we'll give it a reasonable name and then we will choose the Capture E performer that we just created and in the character class because we're using a Metahuman we've created a custom one I'm not going to go into that right now but in the goodie bag there is a video that explains how to do that and essentially Once we've got that all set up with the character mesh, you can see I've left the retargeter and the character IK rig blank. And that's because if they're left blank, they will just get created. And Unreal is going to automatically create those for us and do a fairly good job at the retargeting. So as you can see, it's created. And again, like the previous step, it just gets added to a list. And so again, this only needs to be done once per actor, per character. And there you go. We've spawned in Richard as this metahuman. And that's the kind of quality of retargeting you can expect out of the box. So it's very, very good. It doesn't mean you wouldn't want to go and change things. And it is actually quite easy to change, which we'll show you shortly. But we've just got his body. And as I mentioned earlier on, we want the face. And so in order to apply the face, it's really easy to just go and choose that virtual live link subject as before. Oh, yeah. So there we go. We've got that all sorted. And as I mentioned about the retargeter, we can tweak that. Simple changes like blending to source can be done from this picker. and what I'm doing with that essentially is choosing to either move the hand from the position that the metahuman would be based on its proportions or we can blend to the original source and just for that hand. And now why that's important is that we might be having prop interaction or high-fiving in our case. So important to know when to do that and when not. But if you want to make more broader changes, you can just quickly open the retarget. You don't have to go looking for it in the content browser and you can pop it open. And typically what we see with an automatic retarget is sometimes the shoulders are a bit slumped or a bit too forward. And it's just a case of going and grabbing the offending bones and making a small tweak. So we're just going to grab the bone that we want and we'll just do some rotation. And we don't have to guess because we can see it happening in the level. and so Richard can perhaps stand in a pose that's challenging for the retargeter and then we can just make our tweaks it's incredibly interactive retargeting but we may need more changes than that I'd encourage you all to check out the Skeletal Mesh Editor I was really impressed at what it could do for example we can actually go and edit the skeleton without changing any skin weights And so being able to, say, reorientate a joint without re-skinning or exporting is extremely powerful. If we do need to edit skin weights, which is typically the sort of thing you're only going to realize the problem until the actor has done a pose that's challenging, it's really easy to just go and paint those skin weights. And you can keep that pose, paint the weights, and see the result very quickly. but in my case this medieval costume was penetrating the neck of the metahuman and so it was easy for me to just come and sculpt the collar out and I didn't leave Unreal so we all have those skills in other applications to do these quick fixes but unless we realise what Unreal is capable of we're going to use our old habits And so I would encourage you to try looking at our modeling tools. And like I said, I was very impressed at what it was capable of. But we need the other character. The other character was already created in a previous step, which was not in this demo. And it was just as easy as that to spawn the other character. And as you can see on this exact same animation data with the different proportions between the two characters, how vastly different they are, yet how well it's retargeting. But I don't think those feet look particularly good. And as I demonstrated, that's an easy fix. So we would just grab the retarget asset. Skip forward a touch. so Richard can hold a pose which is challenging we can open the retarget asset we can grab the offending foot bones and we just make a simple tweak all in real time in other words you can just eyeball the changes you need to make which is how I really like to work but we don't want two characters on Richards. We want it on Elise. So all we have to do in the Katchery performer is just change the source to Elise which has come in as unknown-2. So we'll just change that and there she is. So we're ready for our next actor which I like to think of the camera as an actor, a performer, Vcam. So we've got a Vcam actor in our level. We can just enable that. And I have got an iPad on stage, and I'm just going to wirelessly connect to that and go and frame up, choose my lenses, and get prepared for the action. So I'm just time-lapsing through some of that. But as you can see, it's really easy for me to explore the space, choose my lenses. so the next thing we are ready to record so again as I mentioned you're just working your way down so the next thing is the record tab and in here if any of you have used Take Recorder before this will feel quite familiar it is leveraging Take Recorder but it's just got it in a nice convenient place for you and so the first thing you can do is manage all your slates because you might have a lot of your shooting that day you can manually go and create all of these in a long list or you can just import it as a CSV if you wanted a producer or whatnot to do that. And what that really allows you to do is prep your slate and enter notes and mark whether a shot's complete or not. So it's all about shot management, really. In this case, we're just going to record our two actors. So we've got our characters, I should say, the metahuman and the demon, Oni. But we also going to record our VCAM actor as well Now I recorded the characters themselves but you could record the live link sources instead which you can see here And if you do that and you play that back in Sequencer, it emulates there being live data coming in, which can be really good to avoid any performance issues you might have had. So if your content isn't running at Perth when you do recording, just record the LiveLink. It's happening separately. It's happening on a separate tick. And so that's a nice little cheat. But in this case, I was recording the characters themselves. And so back to Switchboard, because we mentioned it does a lot of things. And actually what we can do is add the LiveLink face app remotely, because that's on Richard's face. And we just added that there. and we can connect to it and we can actually record remotely on Richard's phone. So we'll hit record and you'll see the two devices start recording. There we go. Again, it's all happening remotely from one person. So no one has to remember to hit record on three different places. So here's the action. And here it is in the real world. There we go. So you can see some of those challenges with the height difference coming in there because obviously the hands didn't make contact. Next is the review tab. So we can very quickly just review our action. So we'll open that. And very quick and easy to just take a look at what we just shot. So it's that quick to review your take. And it's very important to review your takes as you go. In the moment of recording, you're thinking about, have I got everything right? And you're thinking about the action. And it's not until you review a take that you realize, oh, wait, we didn't do this. Or, oh, wait, that could have been better. Oh, wait, I've had an idea. It's really important to be able to very quickly review. So next, let's fix that hand contact. So what I've just done there is added a layered control rig. If you want to see a bit more of using layered control rigs, if you haven't seen it already, come and watch the voice-to-visual demo. And so what I'm going to do is just correct what needs correcting. I'm not going to edit the original keys. I'm not going to have to go through a whole string of bait keys and grab some of them and warp them and lattice them. It's none of that. we just add the keys that we need to make the offset the original animation. So I'm just making a correction to the pose where the hands connect and I set a nice clean key at the beginning which is unchanged and then I'm just going to set a nice clean unchanged key at the end so that the offset to the hand blends in and back out again. And so here's that edited motion. Really intimidates the MetaHuman, brings his hand down. MetaHuman realizes that this is a friendly high five. Also really good, you know, if you want to edit motion for prop interactions, doors, that kind of thing. Next thing I wasn't too happy with was the camera pose. And it's the same thing again. We're just going to add, in this case, a layered additive, I should say, transform. and I'm just going to make the changes I need to make to get the motion looking the way I want it to look. I'm not reanimating this camera. I could. You could just add the new camera and reanimate it. I could get the camera from another take and use that. But in this case, I'm just making changes to the original motion and only the changes I need to do. I think in this case, I think it was like five sets of keyframes. It's nothing. so just making those changes and then here's the final motion with better framing and at the end I just kind of wanted to get a bit more close up with the MetaHuman so there's our motion edit section complete but if you remember we recorded on the phone that was on Richard's face as well. And it would be inconvenient now to run over to Richard, take the phone off of him, plug in a cable, plug that into the machine, find those files. It's a pain. So instead, we've got Capture Manager, and it lives in LiveLink Hub. And so you flip LiveLink Hub into Capture Manager mode, and you connect to the device with the IP address. This is all going to happen remotely. And once you've connected with it, you can select the takes that you want. You add them to a queue and then you transfer those to your project wirelessly. The phone is still on Richard's face. You can choose where you put them. to the destination of those files. And once they're in, you then have got a bunch of video and depth data and some audio. And that's essentially the performance that we captured. And what this allows us to do is to do an offline solve of the facial data. But the first thing we need to do is just check we've got the data coming in. Sorry, my mic is catching somewhere. So, yes, this is what brings us over to MetaHuman Animator, because we're going to, first of all, use that footage to create a MetaHuman of Richard. So we'll create a MetaHuman identity. And we can take that video and build an identity off of Richard, which we're then going to use to solve the animation from that video. So we'll load in our footage. And there's a process here, typically working from left to right at the top. And it's grabbing features off of Richard's face. And we're assessing those. We're auto rigging and we're generating a metahuman based on Richard. You'll see his direct likeness once this is done. I've sped this up it's not quite as quick as that but just to give you guys to this point an idea of how long it took to create this demo obviously I've been editing it to make it concise to communicate here but we shot all of this over about an hour and a half so what you're seeing here fits into something you could quickly do after lunch it's not taking too long of what I'm showing you including all the motion editing so yeah next thing we do is make a metahuman performance and we will then load in the footage that we want and the metahuman identity there's Richard and then we process that so there you can see Richard's likeness in that metahuman and now it's running through that video data and producing facial animation Now we could either apply that facial animation to the original metahuman by exporting that animation to that metahuman. Again, if you want to see that as part of our AnimVis demo as well. But we could actually, we've now got a metahuman equivalent of Richard, so we could actually just swap out that metahuman entirely. and just use the body data that we captured at the time. So that, as I said, we've gone through a lot of steps there, but I just kind of wanted to throw out across the room, here's what it looks like. Here's what these workflows are like. And there's documentation for all of it. And as I say, in the goodie bag, there's also data which allows you to recreate exactly what you've just seen. And so that's where you'll find that. So if you guys want to take your pictures. In there is a PDF with links to further learning with instructions for how to import that Live Link Hub animation recording along with the recordings themselves. And actually, if you'd like to work in that project, there's a link to the Slay sample content, which is on the Epic Games launcher. So looking forward to seeing what you guys come back with. Please do share with us. We'd be really interested to see what you've learned and how you've applied it. So that kind of brings us to a conclusion for this talk. We are with the rest of my Solution Architect team over on the AnimVis. And so if you have any questions and you'd like to discuss or see any more of this, please come and see us. We'd be really happy to discuss. And also we'd be really happy to learn about why this is interesting to you. Like, what are you thinking of using motion capture for? That was why I was asking in the beginning, who's in here? You know, what's my audience? Because we're fascinated. It's an obvious, if you work, if you're me, like me, you work in media entertainment, it makes sense. we use motion capture to make movies but I'm sure you're using it for other things as well so yeah, thank you very much for coming and watching this and I hope it was very useful applause applause applause applause